Before we go deep into the technical details of building Android from AOSP and installing it on actual hardware, let’s look at a true not very true scenario.
Building a Connected Android-based Bus Stop Display
Here’s a situation we’ve all been in: imagine you’re running late for an important meeting and you’re waiting nervously at the bus stop. Twenty minutes have gone by and there’s still no trace of it. You’re starting to get edgy.
Hmm, wouldn’t it be useful if you had information about the bus’ location? ? Looks like an idea for a new startup 🙂 At first glance it looks complex, but “I’m an engineer. I can do this! ))”.
So, let’s start with a simple prototype which can just be an Android app which shows bus locations on the map. You ran it on Nexus 7 and it all looks awesome.
The next question is – what do we need to be able to deliver such an app as a product? We can enumerate some requirements:
- Run in one app mode (or Kiosk mode)
- Able to remove all unnecessary services, apps etc.
- Easy to update the main app
- Device Monitoring and logging
- Over-the-air updates
We have an unattended Nexus 7 tablet in the office and I think it could be a good start to make a prototype of a bus stop using this device. So, is a Nexus 7 with the stock Android up to the job?
Definitely no, because it has a huge number of redundant apps and the user can operate with it like with the usual tablets (open browser, read news, turn off our app and other people can’t get information about bus’ location), but you want to restrict such usage.
There are a couple of ways for us to achieve our goals:
- make device rooted;
- configure a device as kiosk mode using Android for Work feature;
- create your custom firmware based on AOSP.
If you are looking for the help with customization of your own build of Embedded Android that was built from AOSP or any other open-source version just let us know.
The first way looks simple, but it’s not ideal for a huge number of bus stops, because you should hack every new Nexus 7. So in general you will spend a lot of time setting up new devices and all your changes will be on existing firmware. Moreover, this way has a significant number of limitations. For example, it will be hard to organize on-air updates.
The second way allows you to automate your installation, but it has a limited number of allowed extensions above base Android. Before you choose this way, you should definitely be aware that you will not be hampered by these limitations. Learn more on page.
The last way looks more complex than the previous possibilities, but the good thing is that you can do what you want without any restrictions.
Build your own Android
This article is a part of a bigger guide about Embedded Android that intends to cover a broad set of topics about using Android as a platform for embedded devices.
In general, building your own AOSP looks too complicated and it always seems like you will need to spend several weeks setting up the environment and compiling AOSP. Take courage, just follow the guide below and you’ll see how simple it can be.
1. Choose Android version
First of all, we need to decide what version of Android firmware we want to build. Today we have Android versions 4.0, 5.0, 6.0 and the new Android N (7.0 Nougat). It looks like a hard decision, but it’s really not too difficult.
There is one simple rule: you should choose the most recent released version which is available for your device.
That means if we want to build a firmware for Nexus 7 we should get the latest stable release for Nexus 7.
We can even use Android N because it already has preview 4, but there are some considerations about using Android N while it’s still in preview:
- this is still a preview, which might contain bugs, so you cannot be sure about stability;
- release of the Android N can have significant changes after review;
- hardware manufacturers only release device drivers for stable versions (more about device drivers in section Download device drivers)
So, we need to create a custom firmware for Nexus 7 and the last stable version is 6.0.1. Let’s build it!
2. Hardware and OS requirements
Android is not just a simple app, this is a Linux-based operating system which controls your device. In order to build Android OS from source code there are strict requirements for hardware where we can run a build process.
Below is recommended set of configurations for the build machine:
- 50 GB free hard disk space (required);
- min 8GB RAM, recommended 16GB;
- 2.0 GHz CPU with several cores. This parameter influences build speed – a more productive CPU means less build time. Moreover, if you have several cores you can parallel build the process (as demonstrated in build section).
As for the OS you can use Linux (Ubuntu, Debian, etc) or Mac OS to build firmware, but there is currently no Windows support. If you have Windows you can install a virtual machine with Ubuntu like VirtualBox.
The best solution is to use Mac OS 10.10 or 10.11 or Ubuntu 14-15 because they are the most widely used OSs for building Android OS and you will easily find help and suggestions from the Android community.
In this tutorial I will use MacBook Pro with 2.3 GHz Intel Core i7, 16GB RAM works on OS X El Capitan 10.11.5.
3. Prepare console
Open terminal and always use the same console tab for all commands in this tutorial.
NOTE: It is important to always use the same console tab, each tab has its own environment variables and if you do not follow this recommendation you will have errors.
# Build scripts based on bash language and to avoid any errors it
# would be better to use bash shell. Today there are many shells
# which can be set up on your computer like zsh, csh. To be sure
# that we are in bash shell just run it.
$ bash

# Create directory in user's folder with name 'aosp'
$ mkdir ~/aosp

# Move to created directory
$ cd  ~/aosp

# Build process uses a big number of file descriptors, especially if
# you run your build with several threads. To handle this you should
# increase allowed number of simultaneous file descriptors. Set this
# limit to 1024.

# This will be enough for our build.
# In general it would be better to add the following line to
# ~/.bash_profile file:
$ ulimit -S -n 1024
4. Configure build environment
Before we start any work we need to prepare our environment that depends on our computer OS. For the purpose of this guide we will focus on the environment setup process for Mac OS.
If you have a Linux-based OS (Ubuntu, Debian, etc.) you can setup environment using this link.
AOSP uses filenames that only differ by case, for example MyFile.java to myfile.java. This is why you should have a case-insensitive filesystem, otherwise after checkout you will have only one file, which will definitely cause an error during the compile process.
To prevent such errors, developers used case-sensitive filesystems and such requirements were added into the pre-build environment test process, which failed before the build process even started. So you could fix everything earlier without waiting a couple of hours just to see the first errors related to the case-insensitivity issue.
By default MacOS runs on a case-insensitive filesystem and to resolve this we will create a disk image with case-sensitive filesystem.
NOTE: If you use Linux based OS you do not need to do anything because it has a case-sensitive filesystem by default.
To build AOSP you need about 40Gb of disk space. In our example we will create the image with 50Gb of space to be sure that we will have enough space for future experiments.
# Create image with name aosp and size 50Gb. As a result
# you will have the image file in current folder with name
# aosp.dmg.sparceimage.
$ hdiutil create -type SPARSE -fs 'Case-sensitive Journaled HFS+' -size 50g ./aosp.dmg

# Mount aosp.dmg to /Volumes/aosp point. This means that
# your image (virtual drive) is connected to the MacOS file
# system.
$ hdiutil attach ./aosp.dmg.sparseimage -mountpoint /Volumes/aosp

# Create working folder. We will use this directory
# to download Android sources.
$ mkdir /Volumes/aosp/android_6.0.1

# Move to the case-sensitive folder
$ cd /Volumes/aosp/android_6.0.1
Check Section:
NOTE: In order to check that all operations are executed as we expect, we are going to run periodic checks on previous commands so to be sure that we are safe to continue.
# Type next command in console
$ pwd

# The right result is shown below. If you have an error or wrong
# result you need to check create image steps.
/Volumes/aosp/android_6.0.1
When we are building Android in Mac OS, the build process uses tools and libraries from MacOS SDK. To get MacOS SDK you will need to install XCode from the Apple site. You need to have an Apple ID to download it.
NOTE: If you use Linux based OS you do not need to install XCode; you should install other tools and libraries. Check them on this site.
After that, you need to link your folder, because Android 6 was created with an old version of XCode where it extracts MacOS SDK into folder /Developer/SDKs.
NOTE: Another option is to install an older version of XCode and use xcode-select tool to switch its toolkit. Find out more about this tool on page.
The new version of XCode has another location of MacOS SDK, and to prevent potential search errors, we will create a virtual folder which will be linked to the MacOS SDK location.
NOTE: You do not need to run commands below if you are building Android N. It already has right path to the MacOS SDK.
# Create folder. We should have created root folder and only after
# that we will create folder with symbolic link.
$ sudo mkdir /Developer/SDKs

# Create symbol link to the MacOS sdk folder from xCode
$ sudo ln -s /Applications/Xcode.app/Contents/Developer/Platforms/MacOSX.platform/Developer/SDKs/MacOSX10.11.sdk/ /Developer/SDKs/MacOSX10.6.sdk
Check Section:
# Type next command in console
$ ls -a -/Developer/SDKs/MacOSX10.6.sdk

# The right result is shown below. If you have an error or wrong
# result you need to check 'create link' steps.
SDKSettings.plist
System
usr
Android uses Java as a high-level language, and to compile java classes we need to have installed Java SDK. Android 6.0.1 requires JDK version 1.7, which you can download and install from the Oracle site.
NOTE: If you want to build Android N you should install JDK version 1.8 from the Oracle site.
Check Section:
After you’ve installed Java, let’s check your environment:
# Type next command in console
$ java -version

# The right result looks like "1.7.x_yy". The important part is "1.7".
# If you have an error or wrong version number, you need to check your
# installation flow.
java version "1.7.0_71"
Java(TM) SE Runtime Environment (build 1.7.0_71-b14)
Java HotSpot(TM) 64-Bit Server VM (build 24.71-b01, mixed mode)
The next step is to install tools (gmake, libsdl, git, gnupg) which are used by the Android build process. To simplify this step we will use the package manager MacPorts. You can install tools manually or use brew, but it’s easier to do this with the MacPorts tool.
Install MacPorts from macports.org and run command below.
# Install make, git, and GPG packages using MacPorts
$ POSIXLY_CORRECT=1 sudo port install gmake libsdl git gnupg
Check Section:
# Type next commands in console
$ gmake --version
GNU Make 4.1
Built for x86_64-apple-darwin14.0.0

$ git --version
git version 2.5.0
5. Install ‘repo’ tool
AOSP contains a number of git repositories, each of which deliver some functionality for firmware.
It is hard to checkout/pull/push each repository separately and we need a tool to control all of these repositories as one. That is why ‘repo’ tool was created.
Repo is a repository management tool built on top of Git. It automates parts of the Android development workflow. It doesn’t replace Git, it only makes it easier to work with multiple git repositories. The repo command is an executable Python script and you can put it anywhere in your path.
If you already have installed repo you can skip this step.
# Create bin directory in home location.
# We will download repo in this directory.
$ mkdir ~/bin

# Add bin to the class path. In general it
# would be better to add the following line to ~/.bash_profile
$ PATH=~/bin:$PATH

# Download repo.
$ curl https://storage.googleapis.com/git-repo-downloads/repo > ~/bin/repo

# Allow execute rights for repo
$ chmod a+x ~/bin/repo
Check Section:
# Type next commands in console
$ repo --version

# The right result is shown below. There are no strict requirements
# for the repo version. You don’t need to worry about the sample
# version. If you have an error, you need to check repo installation
# steps.
repo version v1.12.33
NOTICE: The Android build process is rather time-consuming, but if you plan to do it more than a few times, it would be better to follow the optimization tips to decrease build time. You can find some helpful tips by following this link.
6. Download Android sources.
As we decided above, we want to build Android version 6.0.1, so our next task is to find appropriate sources. The entry point to all available sources is the Android Source Repository https://android.googlesource.com.
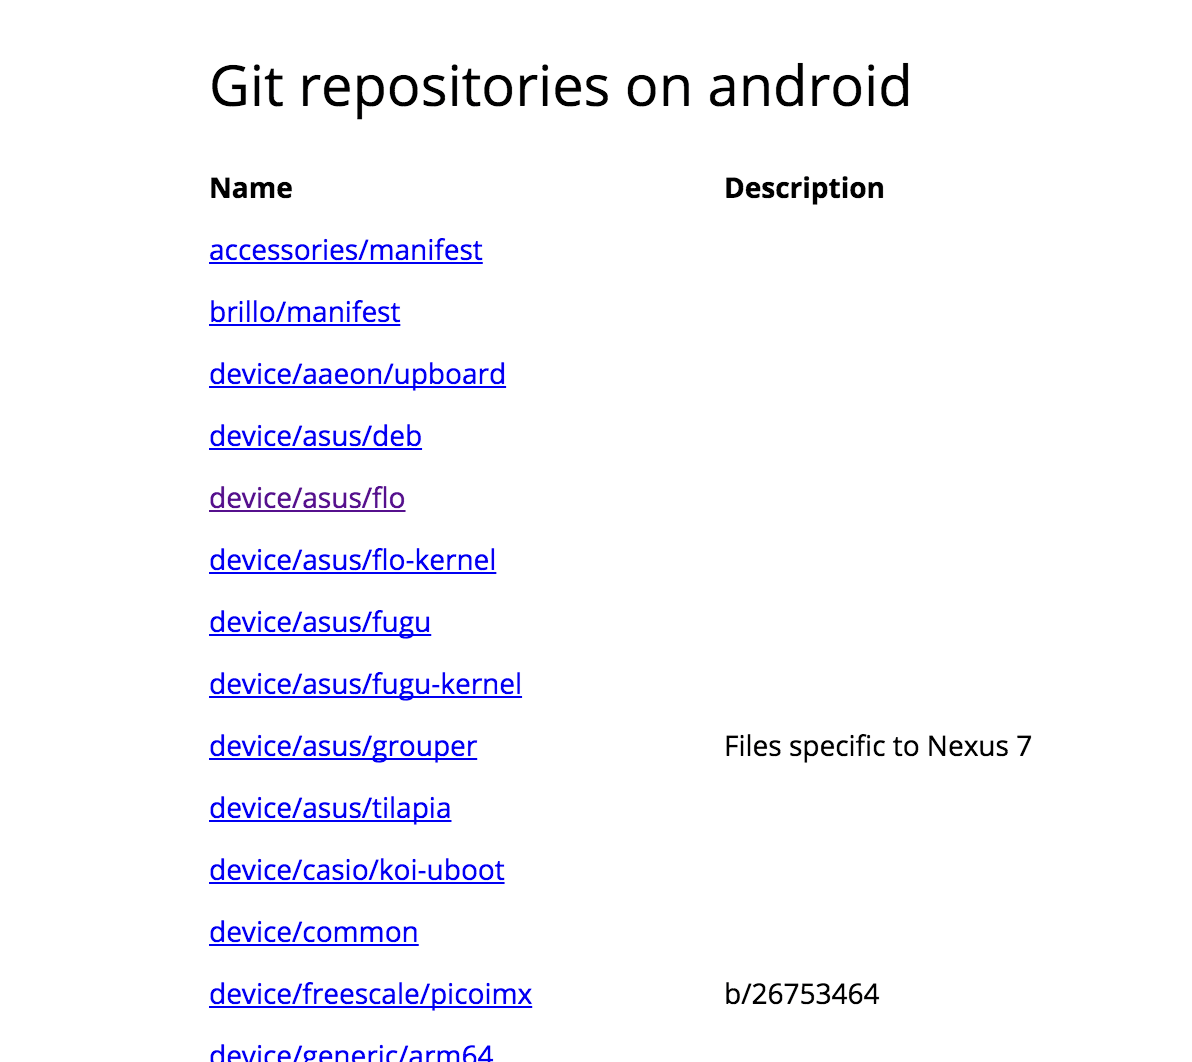
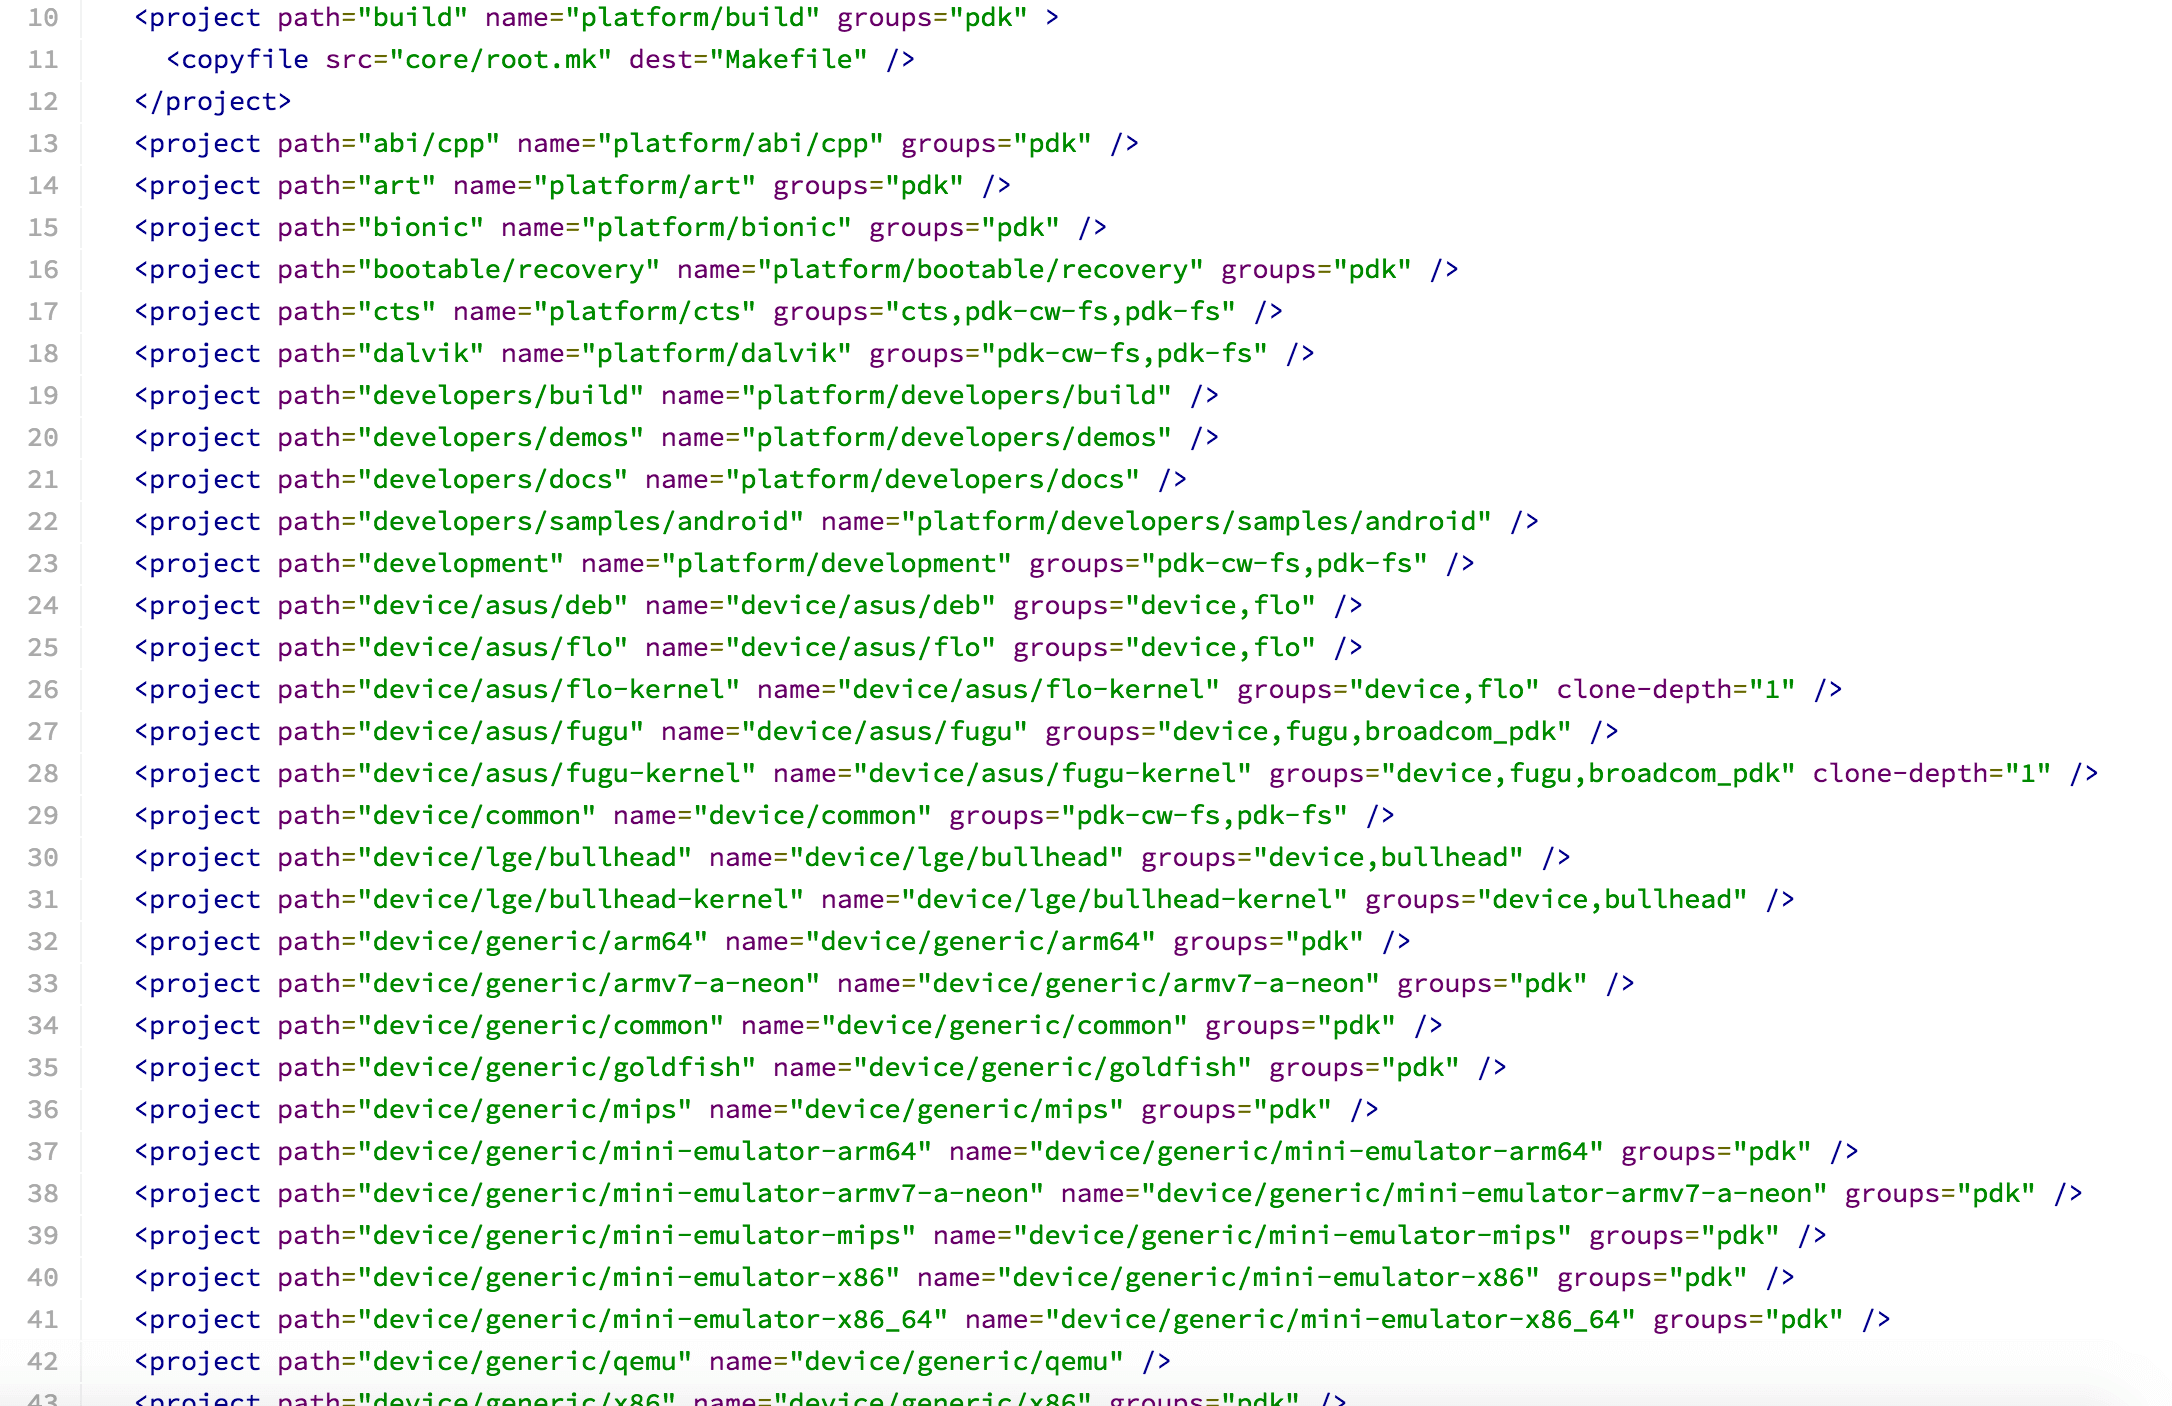
It contains a huge number of projects and it is hard to understand what each of them does, but our goal is to find AOSP. All available versions of the AOSP are located in directory platform/manifest.
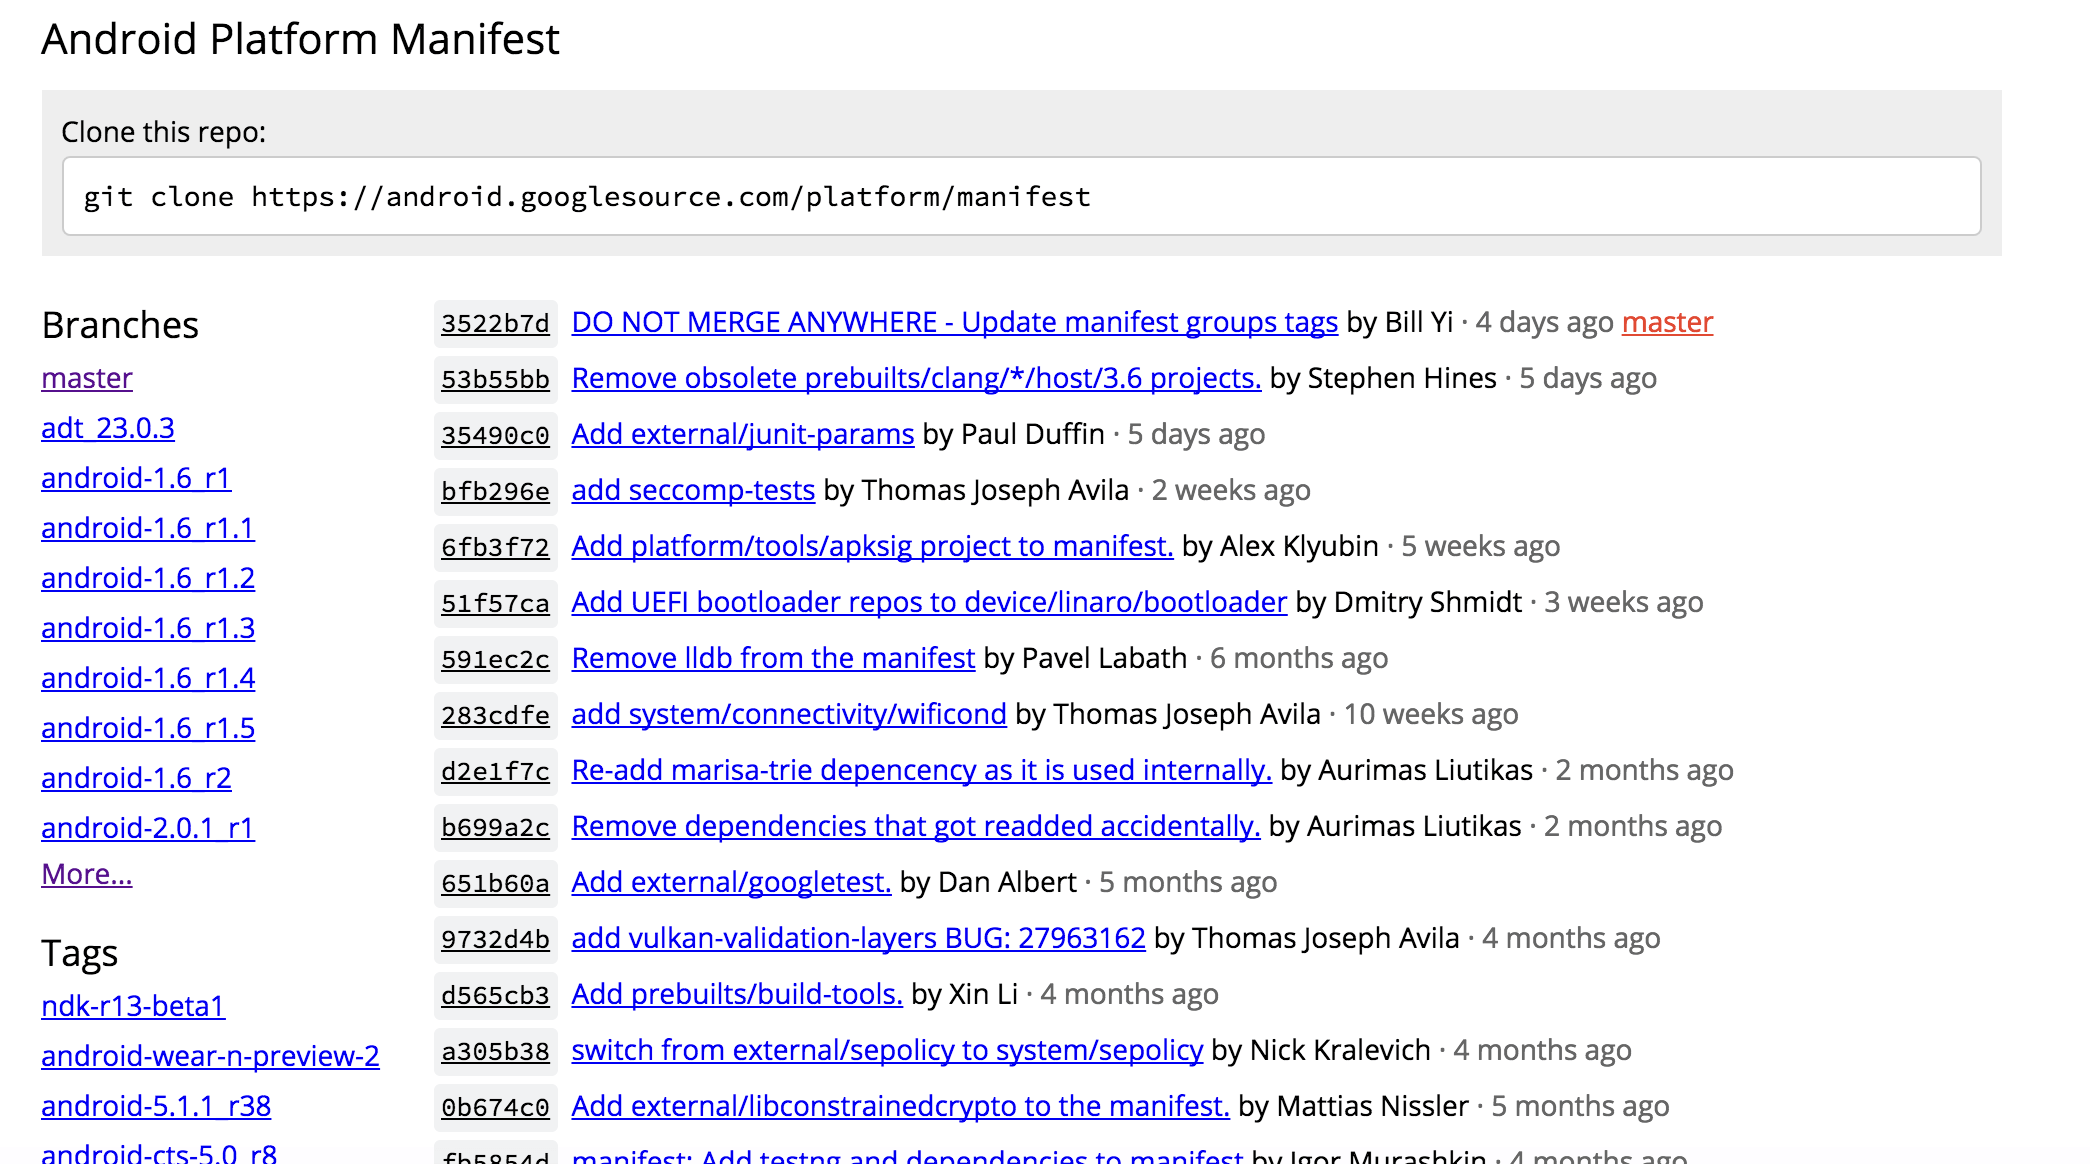
This page contains branches with name android-xxx_ryy, where xxx – version of the Android and yy – revision version. Let’s click on the ‘More’ link and find android-6.0.1*
As you can see, there are many revision numbers for Android 6.0.1, but the best option will be to use the most recent. For us this is revision number 55 and the branch name is android-6.0.1_r55.
The next step is simple, but requires a good Internet connection and plenty of patience. Android contains about 20Gb of source files and we need to download all of them.
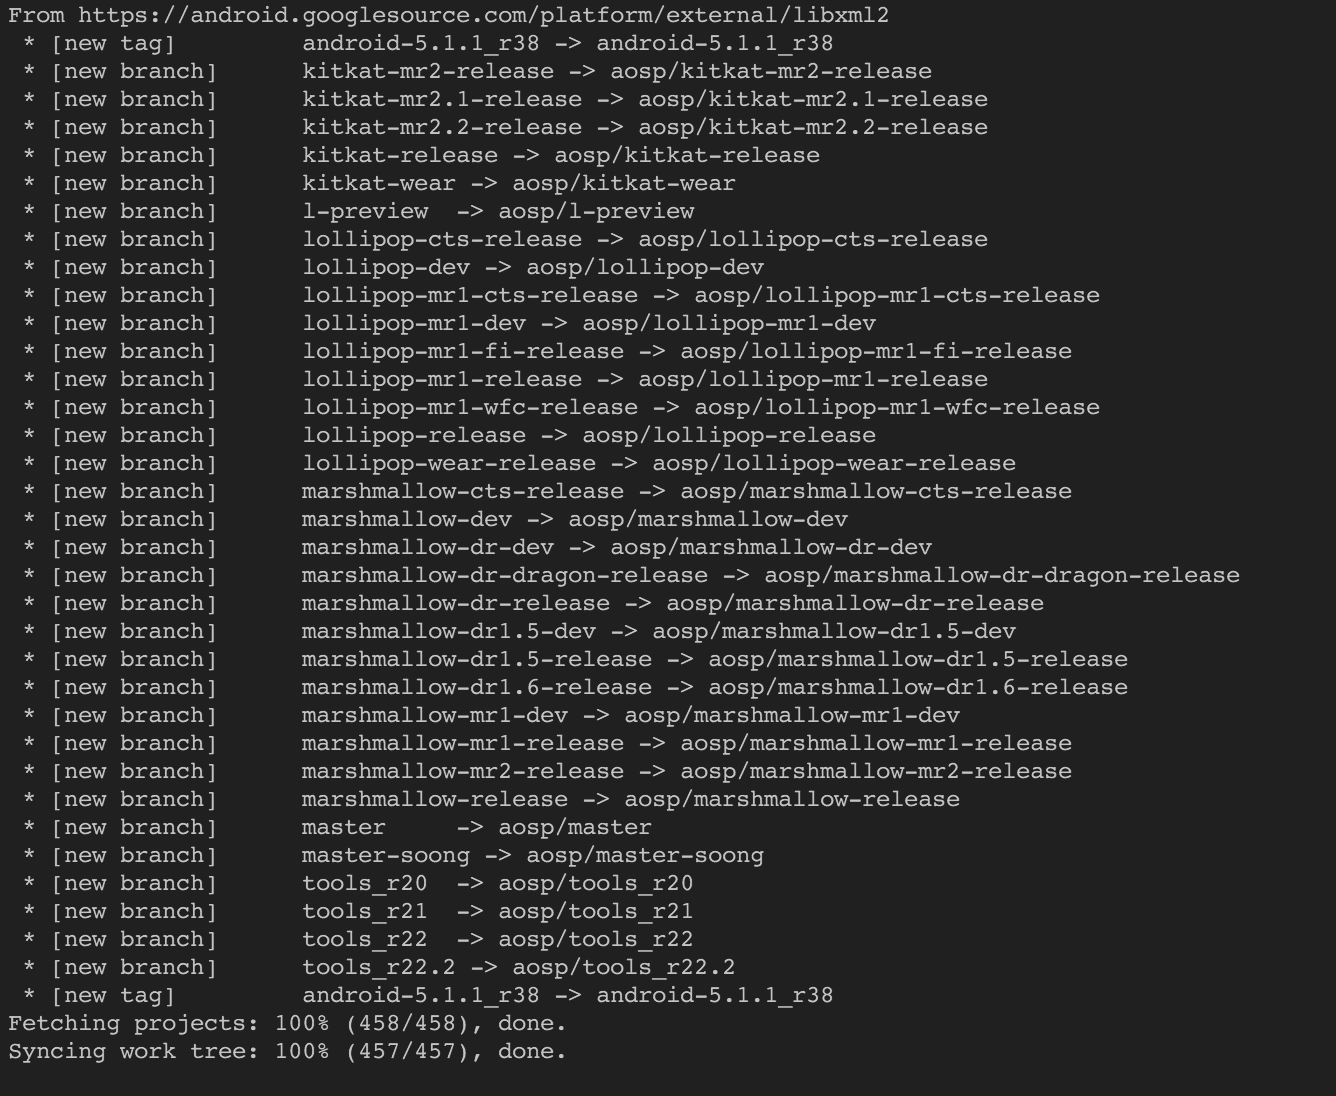
# Initialize repository with branch ‘android-6.0.1_r55’
$ repo init -u https://android.googlesource.com/platform/manifest -b android-6.0.1_r55

# Sync your repo with remote repo (Read as download all sources
# to my computer). -c argument defines to sync only current branch.
$ repo sync -c
After the last command you can get your tea or coffee and take a break for about an hour 🙂
When the time comes and sync has ended, you should see a success message. See the screenshot below.
7. Download and install device drivers.
AOSP contains sources which can be run on different devices and to do this on a concrete device, you need additional hardware-related proprietary libraries. They are not open-source and you can use them only in accordance with the licensing policy.
Each manufacturer decides whether they want to share such binaries for other developers to use or not. It’s usually not. These libraries also heavily depend on Android version. It means that you should find libraries for the concrete version of Android which you want to build.
For example, now we are building Android version 6.0.1 and you should find libraries for your device with version 6.0.1. As we build AOSP for Nexus 7 we will use Google’s Nexus driver page.
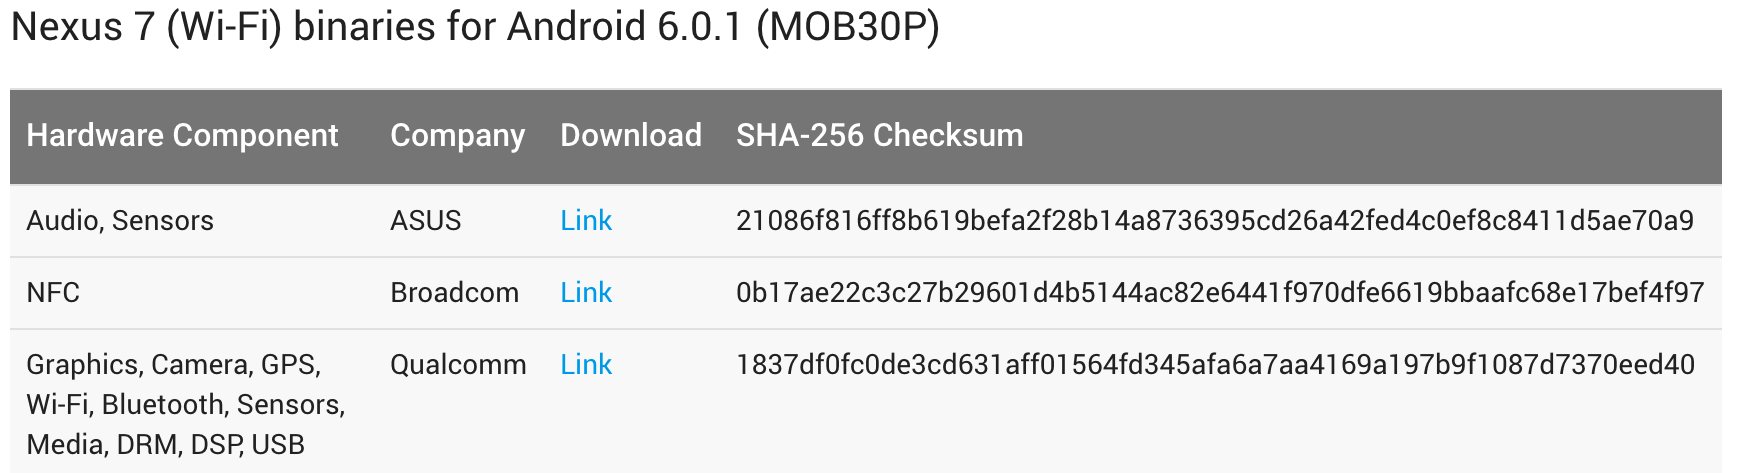
# Download and extract Asus components - Audio, Sensors
$ curl https://dl.google.com/dl/android/aosp/asus-flo-mob30p-cd589457.tgz | tar -xvzf - ; bash ./extract-asus-flo.sh

# Download and extract Broadcom NFC component
$ curl https://dl.google.com/dl/android/aosp/broadcom-flo-mob30p-bbb4a19a.tgz | tar -xvzf - ; bash ./extract-broadcom-flo.sh

# Download and extract Qualcomm components - Graphics,
# Camera, GPS, Wi-Fi, Bluetooth, Sensors, Media, DRM, DSP, USB
$ curl https://dl.google.com/dl/android/aosp/qcom-flo-mob30p-5a8d363a.tgz | tar -xvzf - ; bash ./extract-qcom-flo.sh
Check Section:
# Type next commands in console
$ ls -a vendor

# The right result is shown below. If you do not see
# list folders then you need to reinstall drivers.
asus
broadcom
qcom
8. Build AOSP.
Android 6.0.1 was developed in a time before El Capitan, so we should configure a build to allow it to run on El Capitan. To do this we should add MacOS sdk versions in a config file.
NOTE: If you use Linux based OS you can skip this and move to the next section.
# Open mac_version config file in text editor
$ open -e build/core/combo/mac_version.mk
Find variable mac_sdk_versions_supported and add to the end 10.9 10.10 10.11. This means that we allow build process execution with MacOS SDK version 10.(9-11)
NOTE: In general, editing files under version control is not a good idea. In production it would be better to override variable instead of changing config file.
Before we start our build, let’s check what we have done to make sure we haven’t forgotten anything:
- switch to bash;
- set up number of simultaneous file descriptors to 1024;
- create disk image with case-insensitive filesystem;
- install XCode with MacOS sdk;
- install Java version 1.7;
- install gmake, libsdl, git, gnupg;
- install repo tool;
- download Android 6.0.1 sources;
- download and install device drivers for Nexus 7;
- add MacOS sdk versions in a config file.
The following is the most important part of our quest. A build process will take about 3-5 hours.
# Initialize the environment with the envsetup.sh script.
# It will add additional commands in your path
$ source build/envsetup.sh

# Chose target. flo - this means target for Nexus 7,
# userdebug - config with root access and debuggability
$ lunch aosp_flo-userdebug

# Build command. -jN argument define parallel tasks which
# make can handle, and it's common to use a number of tasks N
# that are equal to the number of hardware threads on the computer
# being used for the build.
$ make -j8
A successful result should show in the console text: make completed successfully.
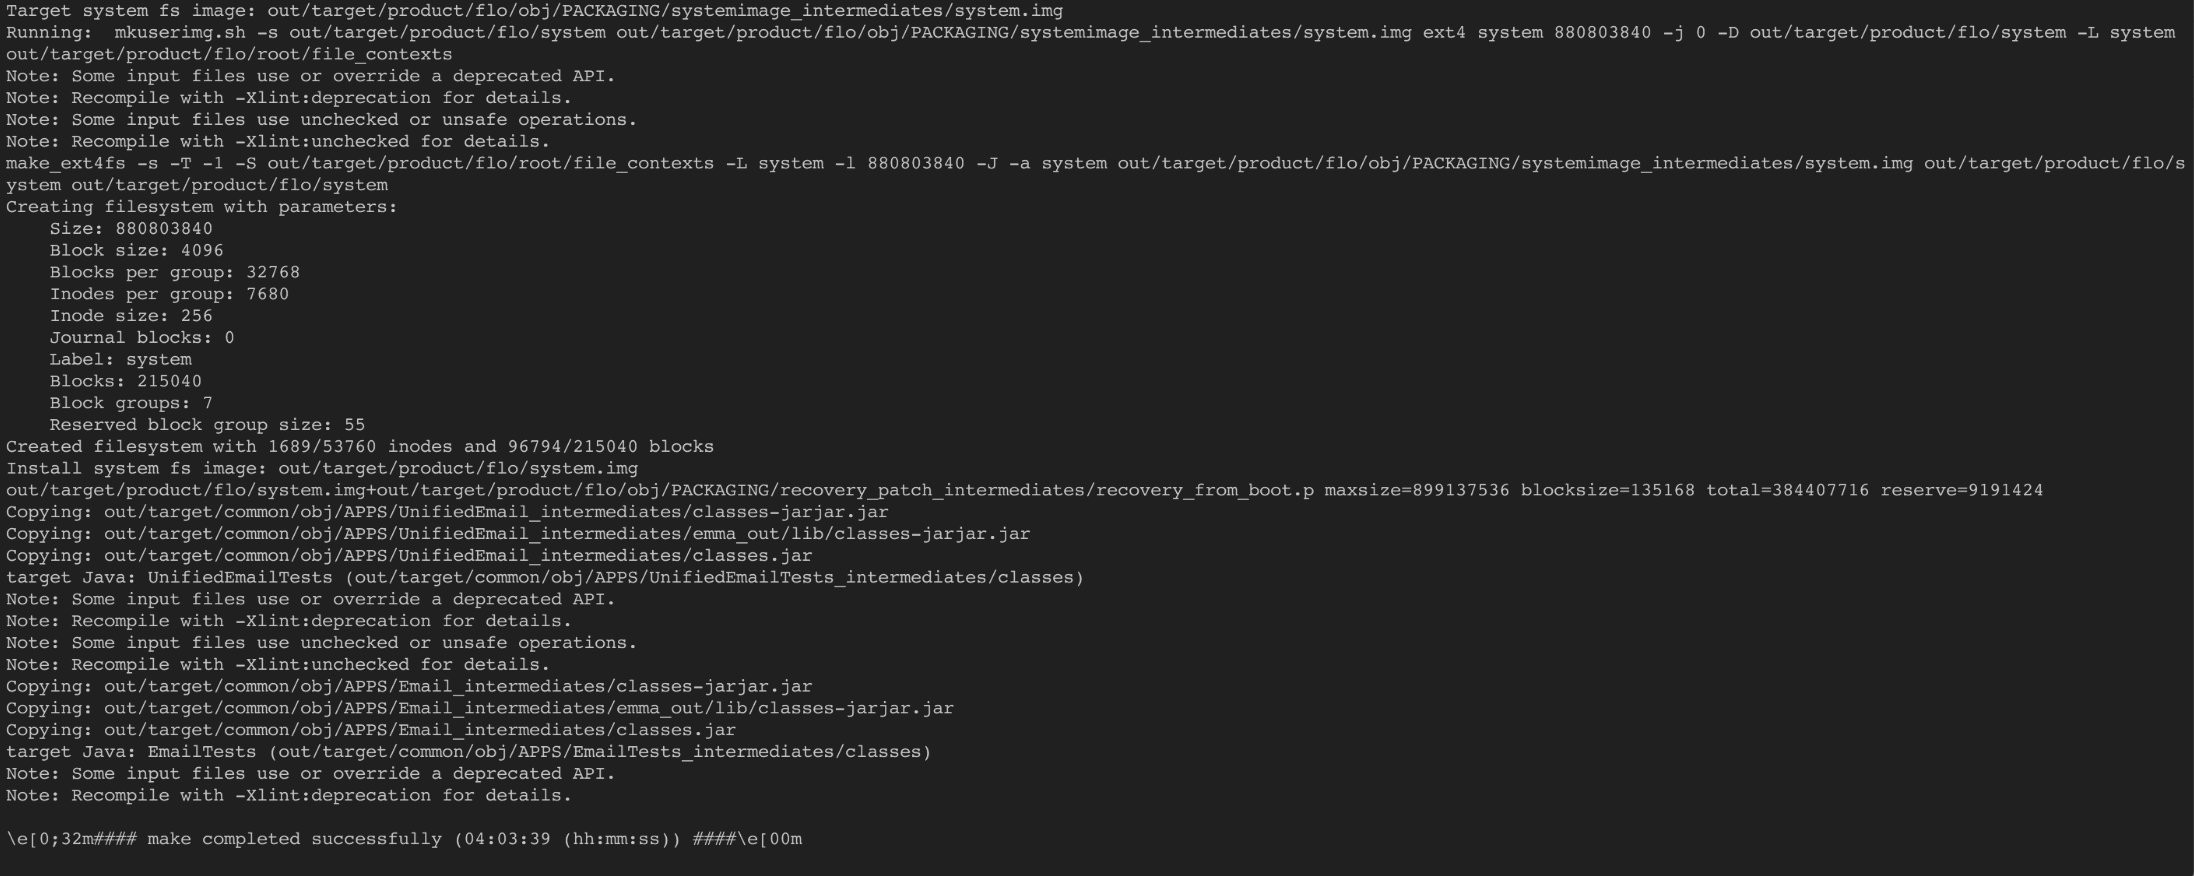
Congratulations!!!
The result of this long build will be in the folder /Volumes/aosp/android_6.0.1/out/target/product/flo/ and it should looks something like this:
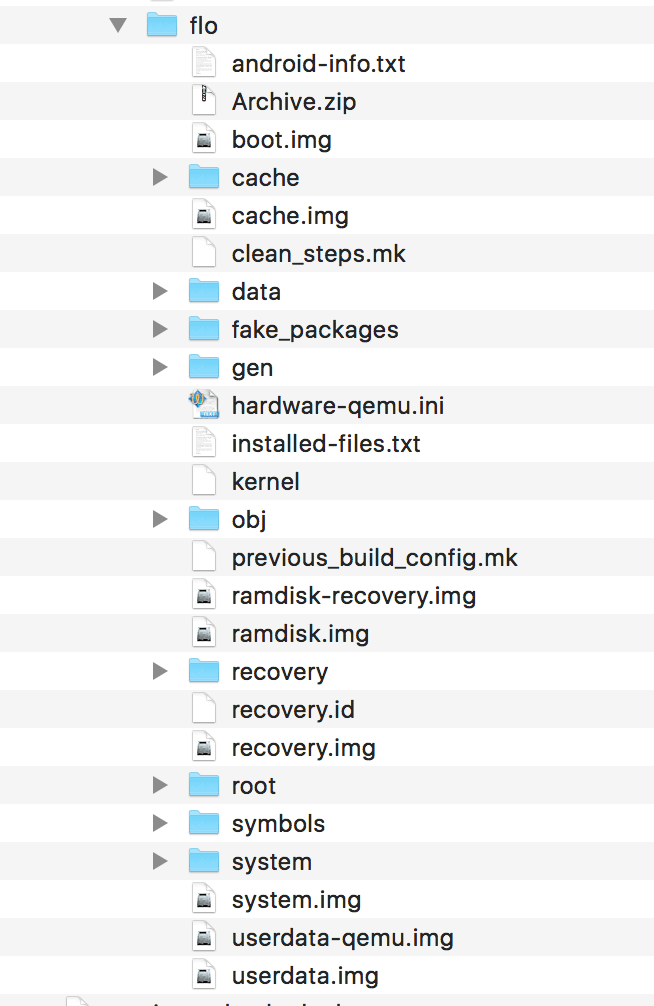
So you can go there and explore the result files. The important files for us are those with an *.img extension. These are images of Android firmware which are used when we are flashing a device.
Check Section:
# Run command to check created images
$ ls -a out/target/product/flo/ | grep .img

# The right result is shown below. If you do not see a
# list of *.img files, then something has gone wrong.
# Please check all steps and rebuild AOSP.
boot.img
cache.img
ramdisk-recovery.img
ramdisk.img
recovery.img
system.img
userdata.img
9. Run own AOSP
Now we have images of our firmware and to check it we need to flash device. Connect device to the computer through a USB cable and run next commands.
# Reboot device in boot mode. Wait until boot mode has appeared.
$ adb reboot bootloader
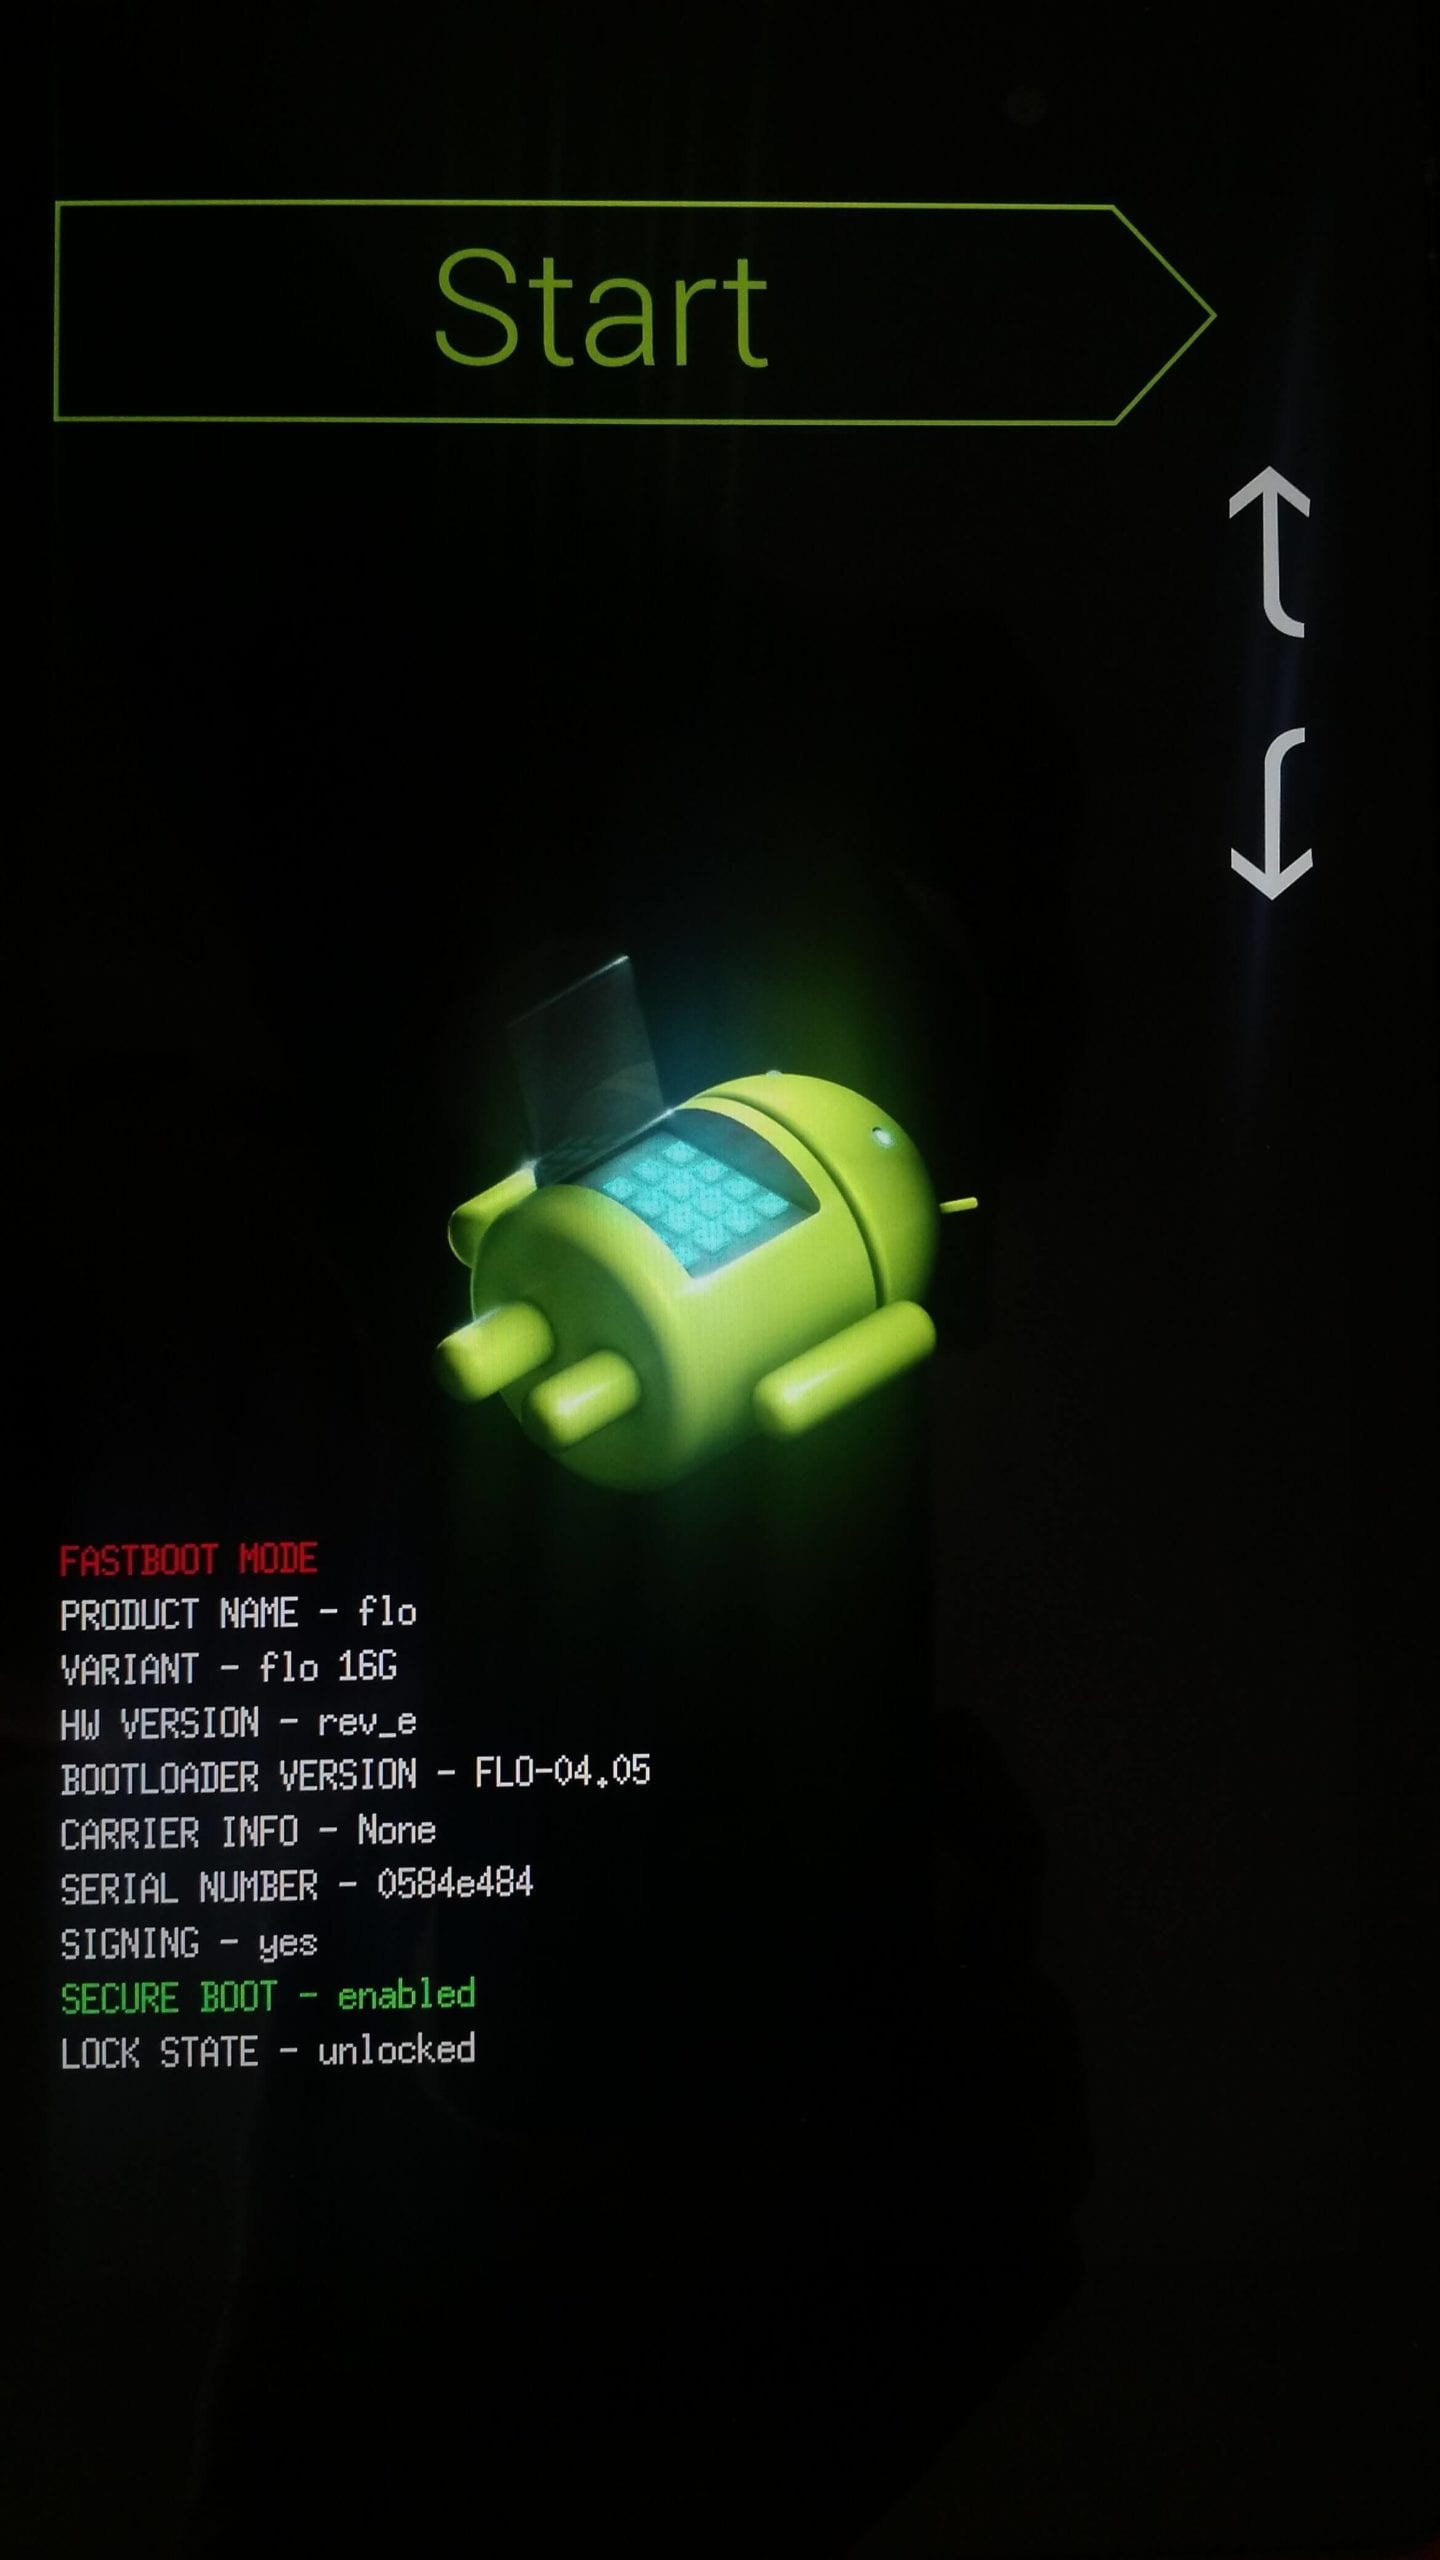
# Unlock device. This command allows you to flash it. Use volume
# buttons to select option and power button to apply option.
$ fastboot oem unlock

# Flash device with new images. -w option wipes the /data
# partition on the device.
$ fastboot flashall -w
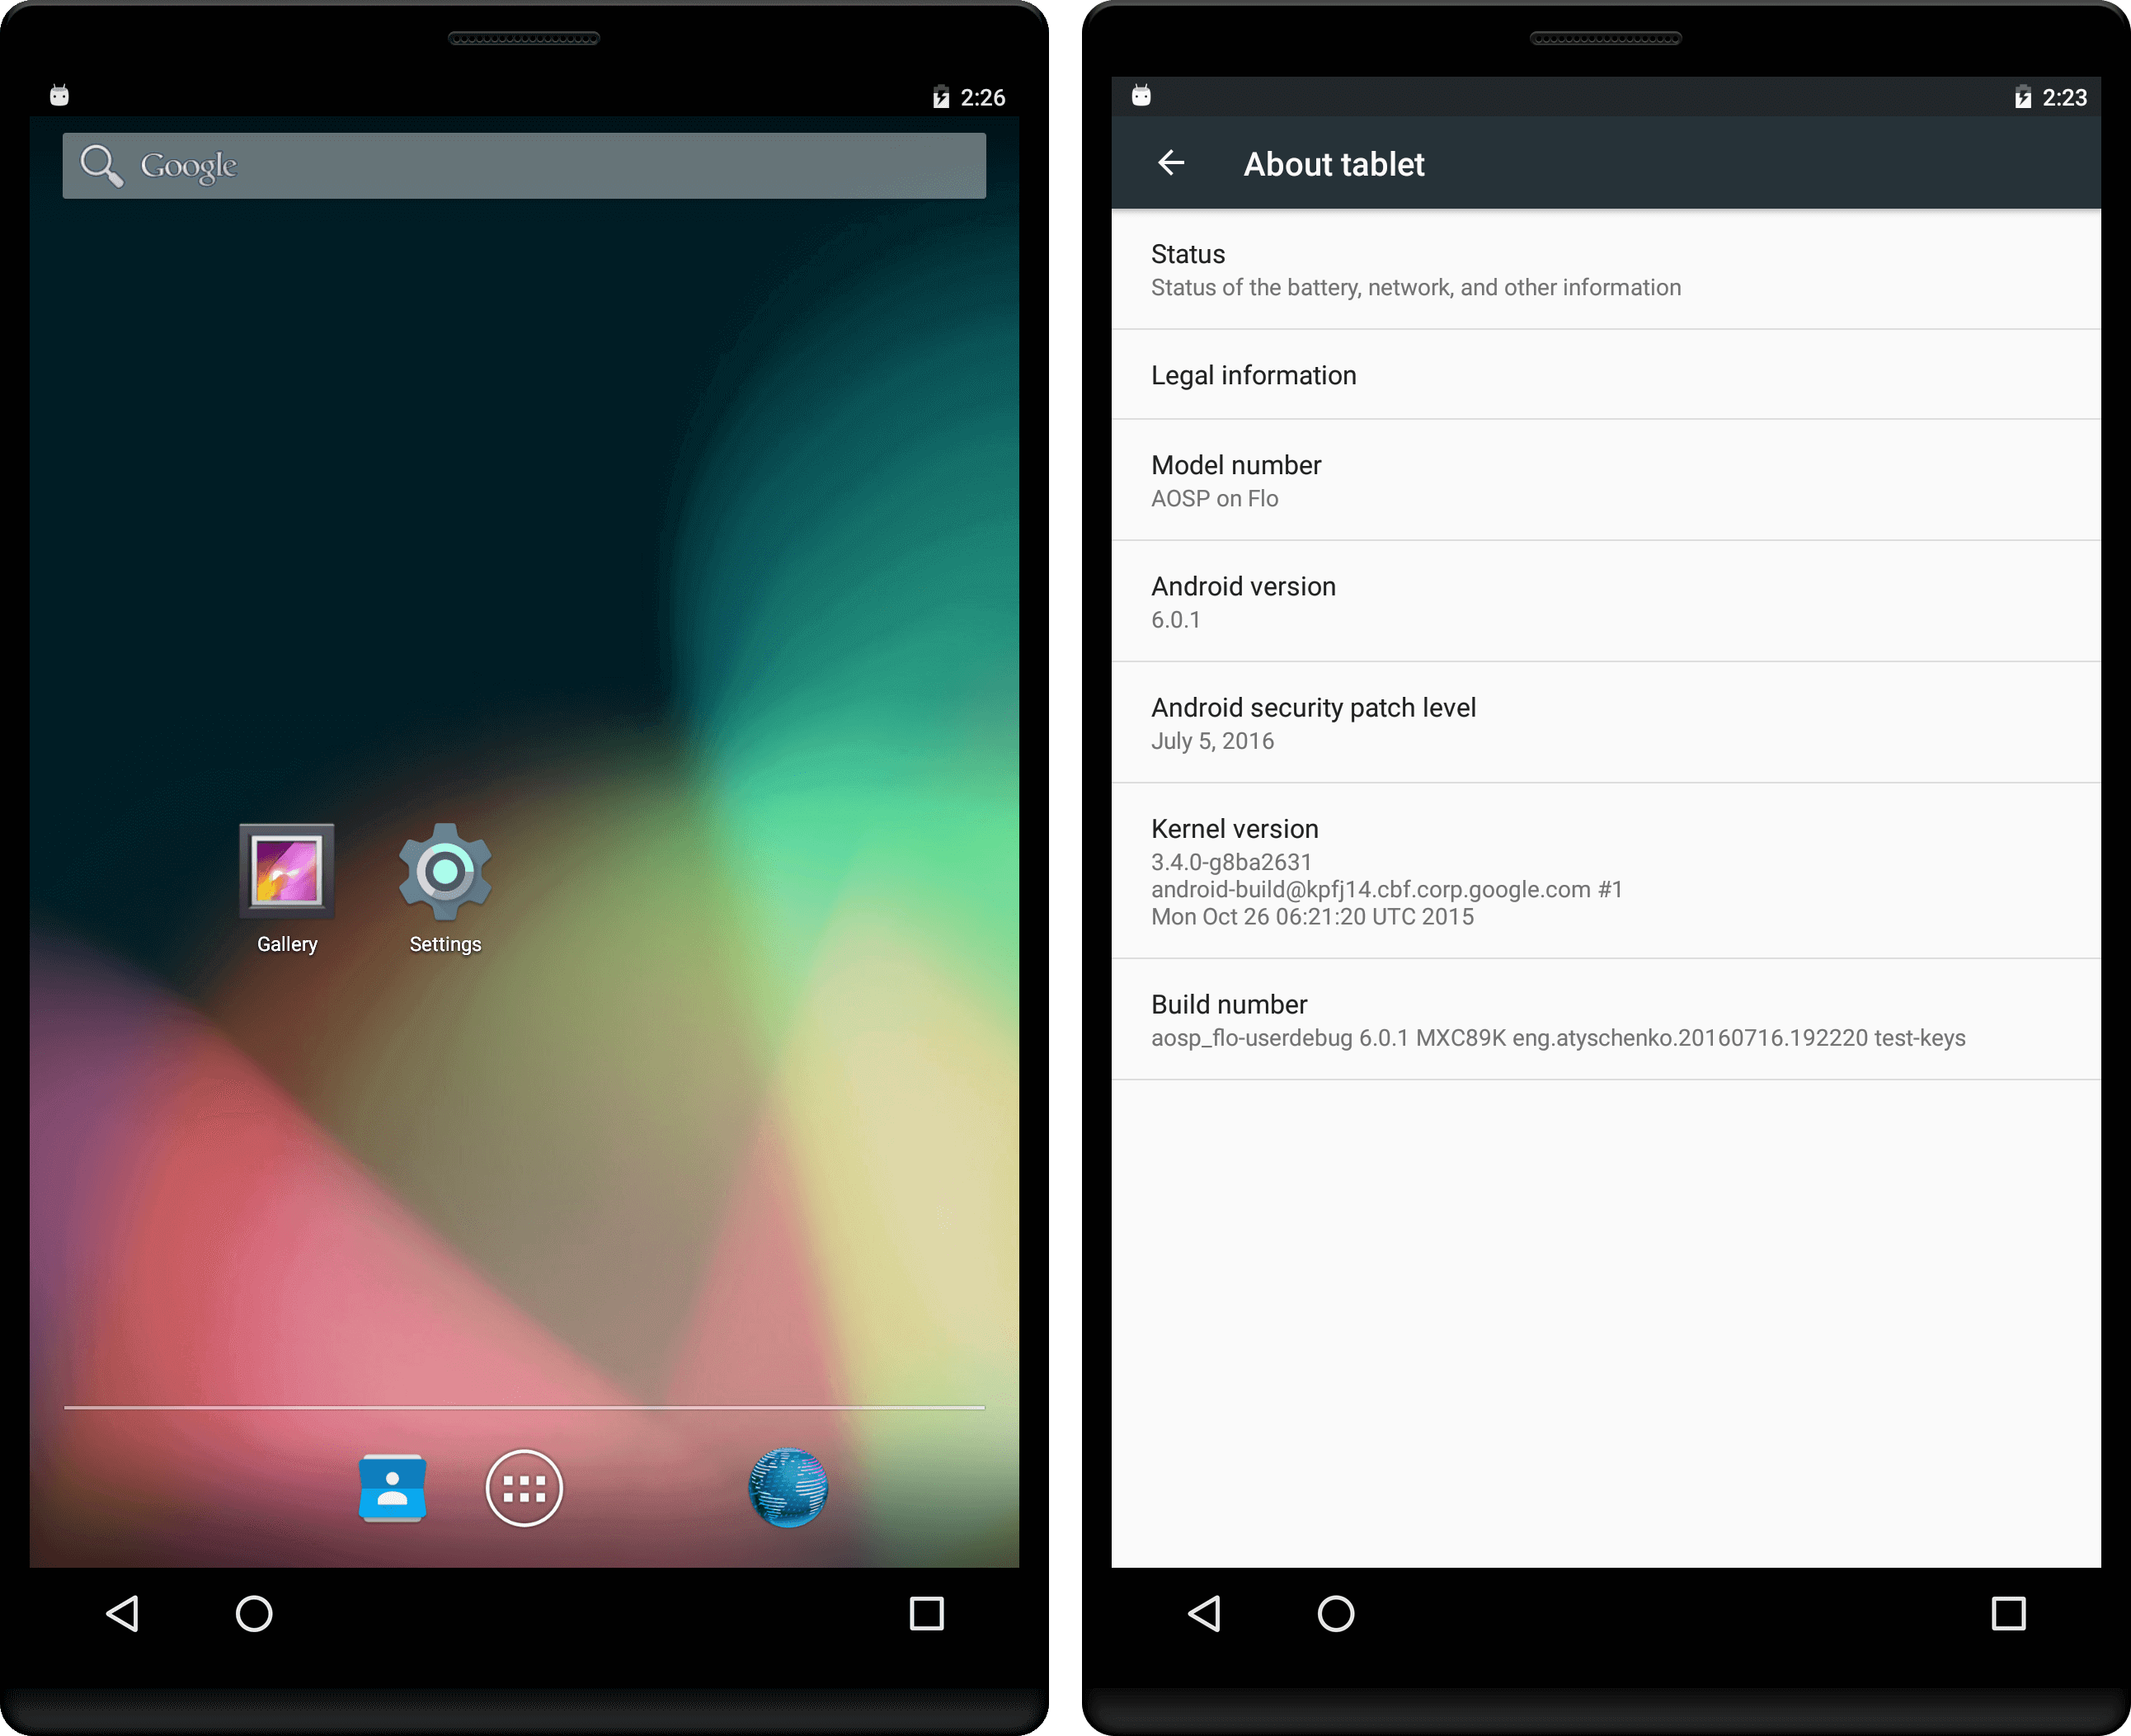
After the last command your device will reboot and after 1-2 minutes, when new firmware is initialized, you will see your own firmware.
What’s next?
We have done a great job! After several hours we now know how to prepare build environment, choose AOSP version, build own firmware and install it on the device. As a result, we have installed firmware which is made by hand and we are ready for the next set of challenges.
In the next part we will look how we can test our firmware to be sure that our software (AOSP) works correctly with hardware and passes the Android Compatibility Tests.