All code changes provoke some kind of effects and we need to know how these changes impact on general functionality. Android apps are working with a limited memory, CPU power and flashing new ROM associated with some changes inside AOSP, so in this case it is very important to debug, test and optimize your new ROM. Having a reasonable test coverage for your new AOSP helps you to enhance and maintain the whole system and to deliver a high-quality product.
Installing a new ROM is a huge gamble for your fleet of Android devices, because you don’t want to brick them or cause broken system features, so it’s highly recommended to run hardware and performance tests. These test runs will allow you to determine whether or not your tablet is stable enough for daily use.
This article is a part of a bigger guide about Embedded Android that intends to cover a broad set of topics about using Android as a platform for embedded devices.
Before we begin, we need to decide what elements we want to test. In our case, there are three things we’re going to be focusing on:
- Software
- Hardware
- Android Compatibility
Our goal is to ship a high-quality product which is working smoothly, has a great battery life, no crashes, works with all Android apps, delivers great performance, etc. So let’s define what we want to test.
Software
Firstly, we need to make sure that a new ROM contains our changes and works as we expected.
Secondly, we need to check device performance (e.g. graphics rendering, UI smoothness, loading time, etc.) because this is one of the biggest problems on mobile devices. More CPU power means less battery life and vice versa, so we want to know if a new ROM has optimal settings.
If you are looking for the help with customization of your own build of Embedded Android that was built from AOSP or any other open-source version just let us know.
Hardware
Because of the huge amount of different devices we need to have a clear list of features that require testing. In our Bus Stop example we need to check:
Multimedia:
- Audio – For playing sounds/music or voice response for disabled people
- Video – For displaying ads or useful information
Networking:
- 3G/LTE connection – For updates and downloading new content
- Wi-Fi – For updates and downloading new content
Sensors:
- Accelerometer – To display UI in proper orientation
- Gyroscope – To make ads more interactive
- Light – To adjust the screen light during the day
System:
- Camera (photo, video) – Can be used for interactive ads
- OpenGL ES – To display HD graphics
- Touch screen – To have control over the device
- Storage (read, write) – To store content and apps
- CPU, GPU – To make sure ROM works smoothly
- RAM usage – To prevent overload and memory leaks
Compatibility
Any changes in AOSP can cause problems with running native apps. In this case we need to make sure that nothing is broken. To solve this problem you can run Google Compatibility tests. This test set can be performed manually and on CI.
Google provides predefined plans:
- CTS — all tests required for compatibility
- Signature — the signature verification of all public APIs
- Android — tests for the Android APIs
- Java — tests for the Java core library
- VM — tests for ART or Dalvik
- Performance — performance tests for your implementation
These tests produce reports with boolean True/False conditions for each test case. You’ll get a short explanation if something went wrong.
Manual Tests vs CI Automation
So now we know what we want to test, it’s time to decide how we’re going to run these tests.
There are two ways to run such tests: manually or using CI automation.
Manual Tests
The manual method is a fairly simple and very fast way to verify your ROM. Everything you need is already implemented, so just download the app and you’re ready to go with your hardware testing. On the other hand manual testing requires more effort, attention and planning. Also manual testing involves running apps for testing by your own hands. You need to download, install, run, click all menu items and analyze test results to make sure they match the expected results. This is not a problem if you only have a couple devices with a new ROM, otherwise you’re in trouble.
If your device farm has a lot of different devices and new ROM versions are released regularly, you are going to need automation. There are a couple ways to implement a test suite and none of them are easy or fast.
Google provides free compatibility tests for different OS versions which can provide you all information about basic hardware/software checks.
Continuous Integration Tests
Another way of freeing yourself from manual testing is to implement automation cases for your custom apps. For example you can write test scripts which will follow the same steps you are taking manually, e.g. installing test app, running it, clicking menu items from your test plan and displaying report. The most efficient feature you could implement is “one click testing”, where you press the “Start” button on CI and simply wait for the results.
In an ideal world you would have a full-stack automation process, such as:
- Build a new version of ROM
- Flash device with this ROM
- Run Hardware/Software/Compatibility tests against new ROM version
- Check results
Building a suite like this makes sense if you have a huge project and want not only to save time, but also to ensure efficiency of work, distributed team, regression and long testing cycle.
How to get and install test apps
Let’s discuss some options for manual checks. There are two ways to install the required apps for testing your new ROM: using Play Market or ADB (or any other tool). Obviously, to install an apk file you first of all need to get hold of it.
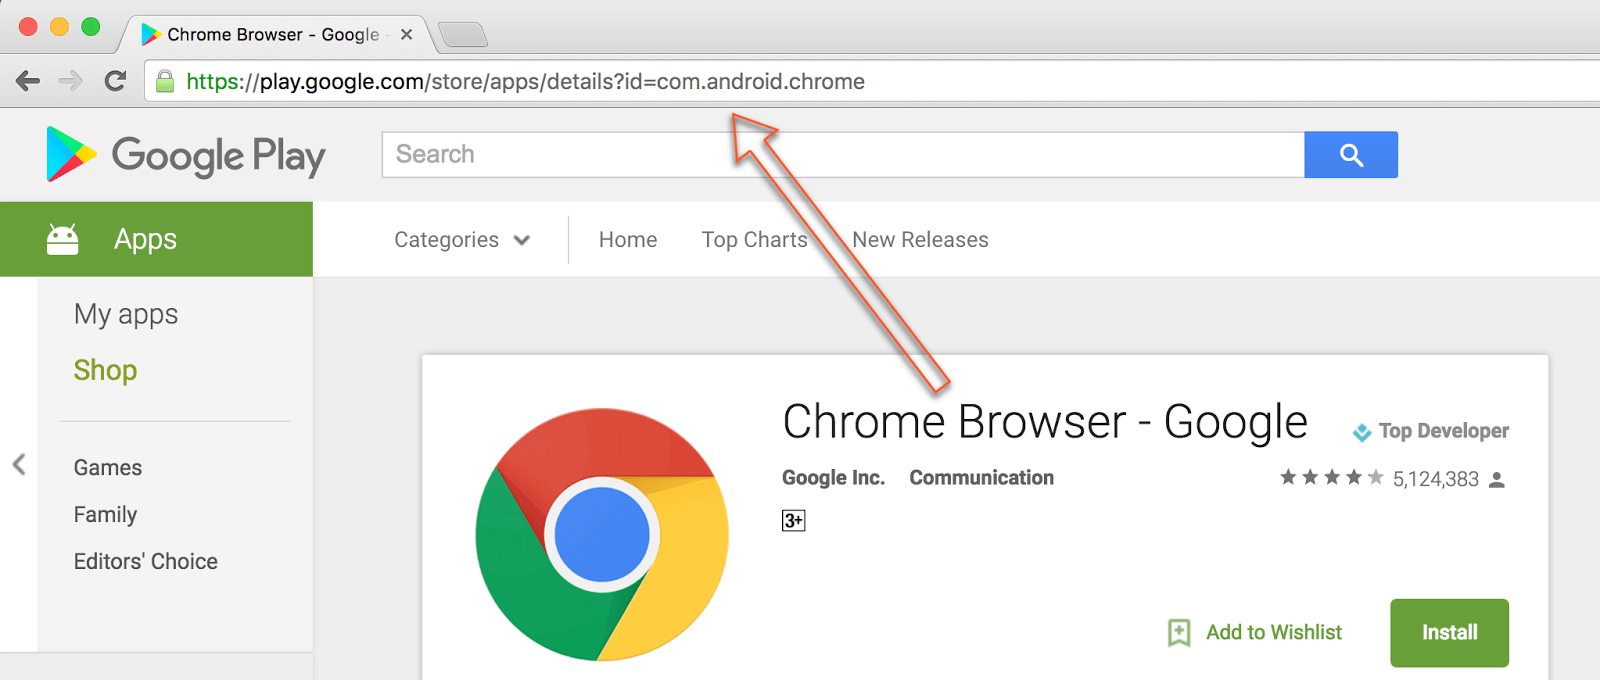
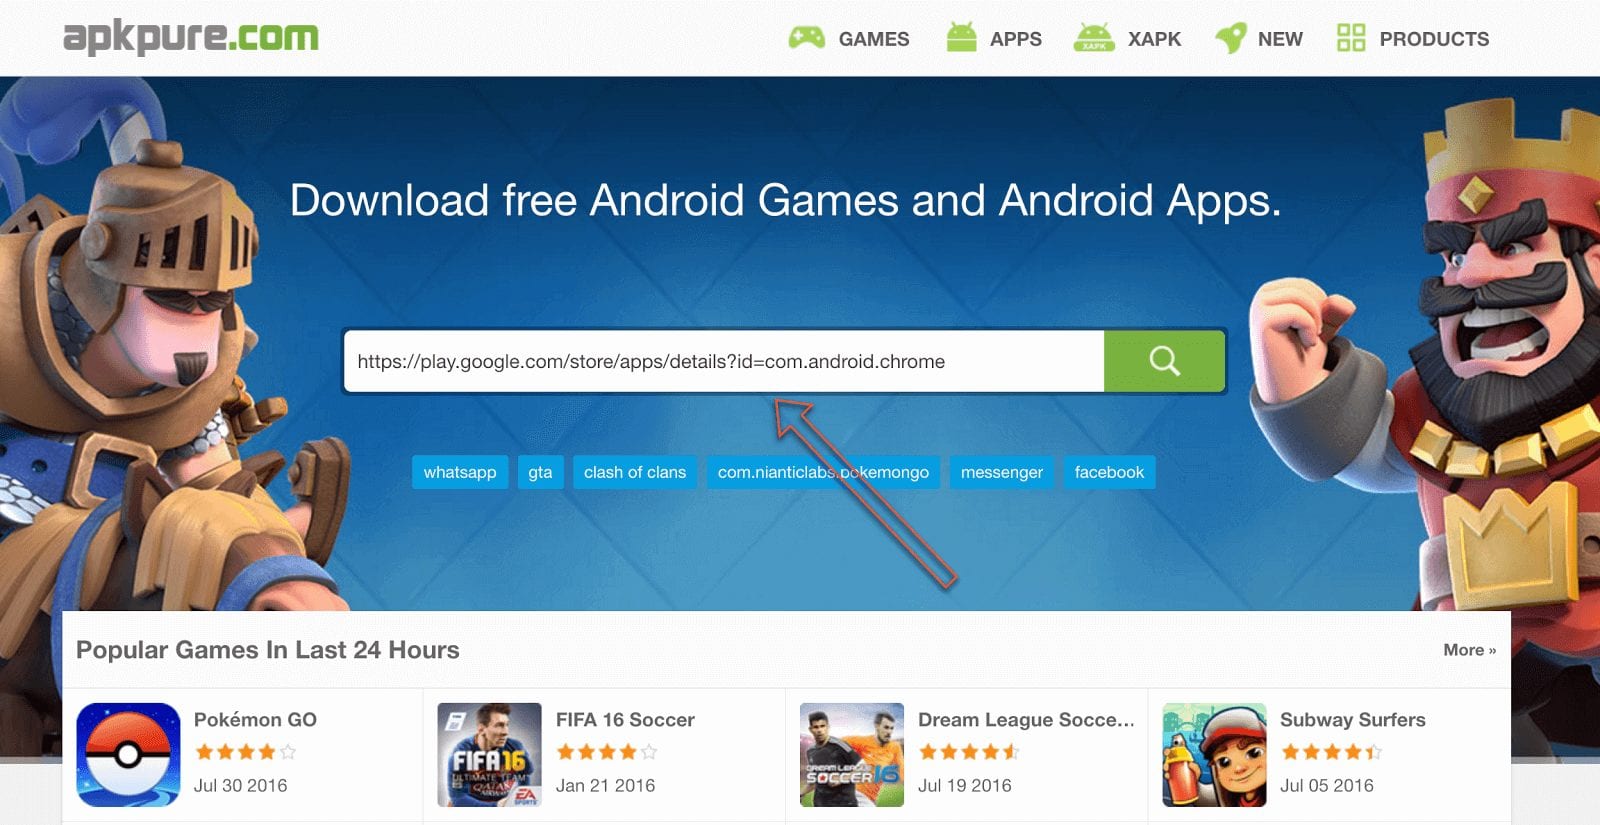
One of the easiest ways to download an apk file is using an online downloader. For example you can use the Apkpure site. Simply copy a link to an app from Play Market and paste it to the Apkpure site.
You need to copy a link to the app from the browser here.
Paste link recently copied from address line to the search field on Apkpure.com website.
You’ll have an *.apk file a few moments later. Please make sure your device is connected via USB and turn On USB Debugging mode. Run command below once it is ready to install the selected app.
$ adb install path/to/app.apk
So, let’s review a couple Apps in the Google Play market which can help you to run system-wide Android ROM tests against your build that run on your device.
How to run tests
In this section we want to understand how to run tests manually using the apps and tools we have chosen.
Here we want to focus on tools available “out of the box” which do not require any additional configurations or support. The following apps have basic functionality and high productivity.
AnTuTu Tester
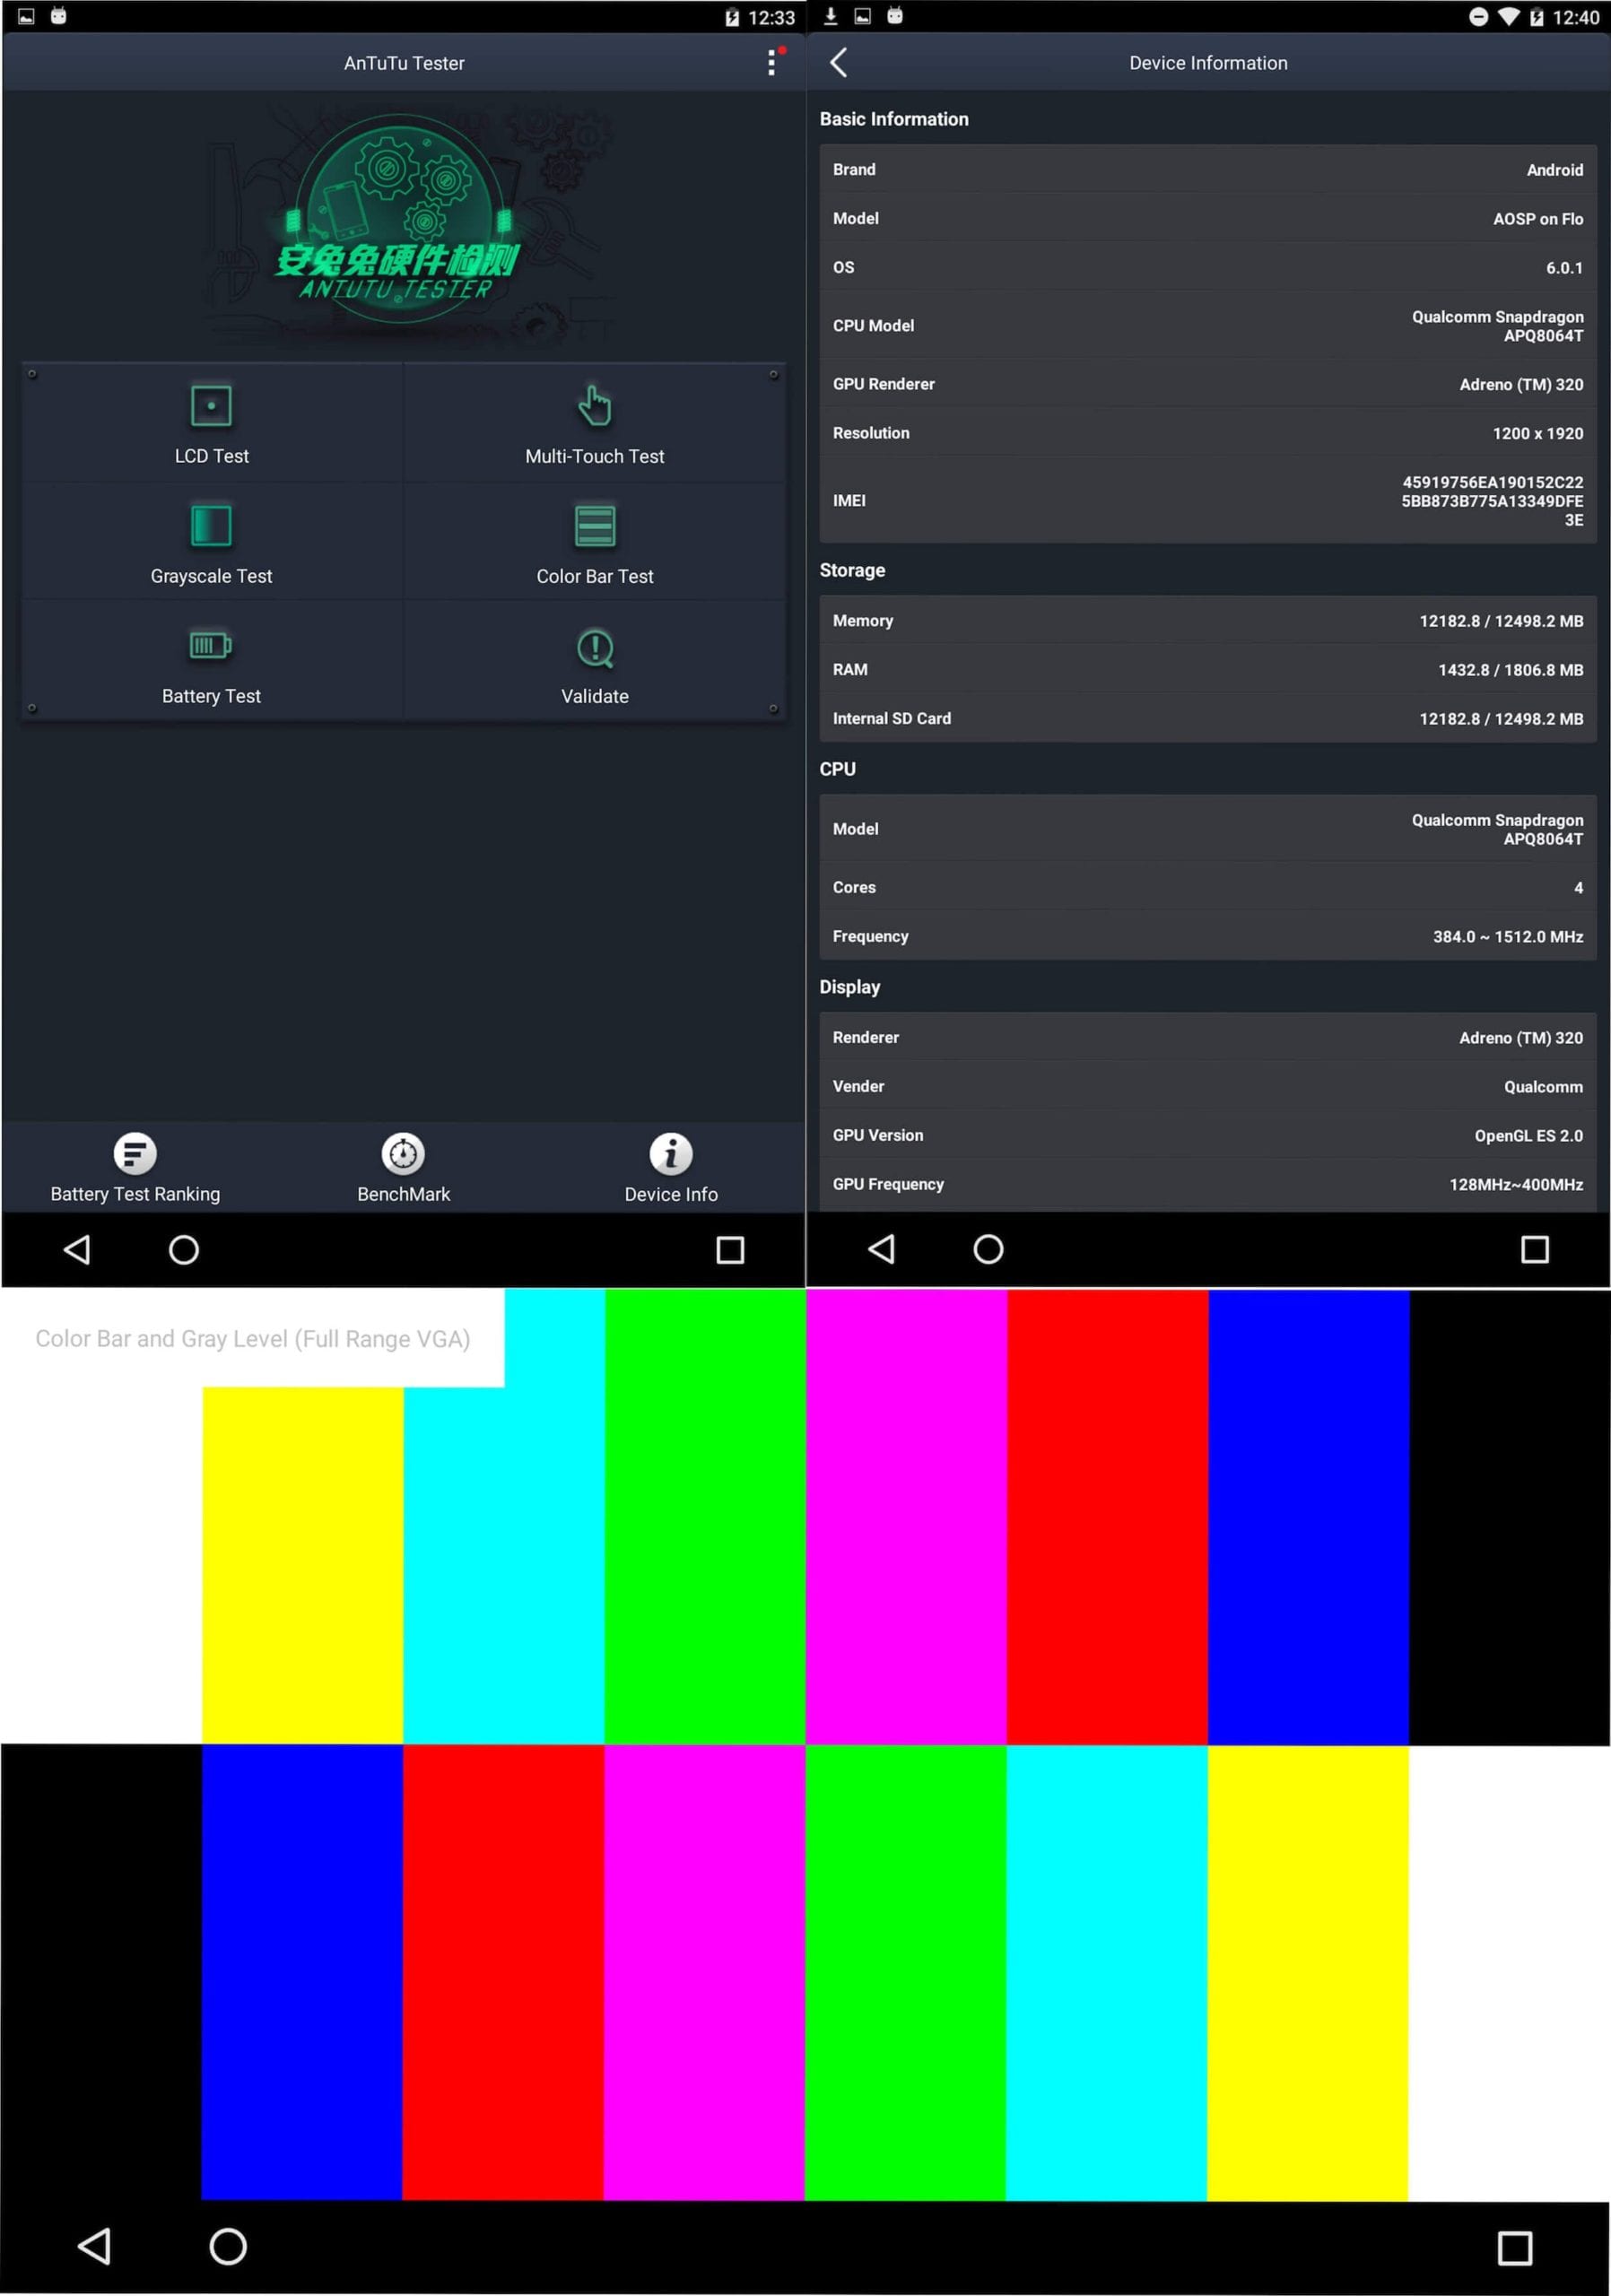
AnTuTu Tester is a hardware tester for android. This tool is good for performing basic checks (e.g. making sure that all device sensors are alive or that multi-touch is working fine) and it allows you to test:
- Battery – App asks you to keep your device on and performs stress testing to calculate a score.
- Multi-touch – App displays a number of touches on the screen, so you can make sure this functionality works as expected.
- System information: Includes info about CPU, GPU, Memory, SD Card, Screen, WiFi, GPS.
The app also includes a built-in benchmark test, so you can see how your changes have affected performance.
Z-DeviceTest
Z-DeviceTest lets you check your Android device sensors’ “health” in an intuitive and comprehensive way, offering in-depth analysis of all the characteristics of your device.
The app works in a fairly similar way to the AnTuTu Tester, but it requires Google Play services to be installed on the device to run.
This app allows you to:
- Check manufacturer’s technical information.
- Test functioning of all your sensors, like accelerometers, gyroscopes, magnetometers, barometers, etc.
- Measure the accuracy of each sensor.
- Test NFC near field communication.
- Test Barometer.
- Test detection of Navstar satellites.
The app includes data about more than 600 different devices, so you can compare your score with other devices and ROMs.
Sensor Box
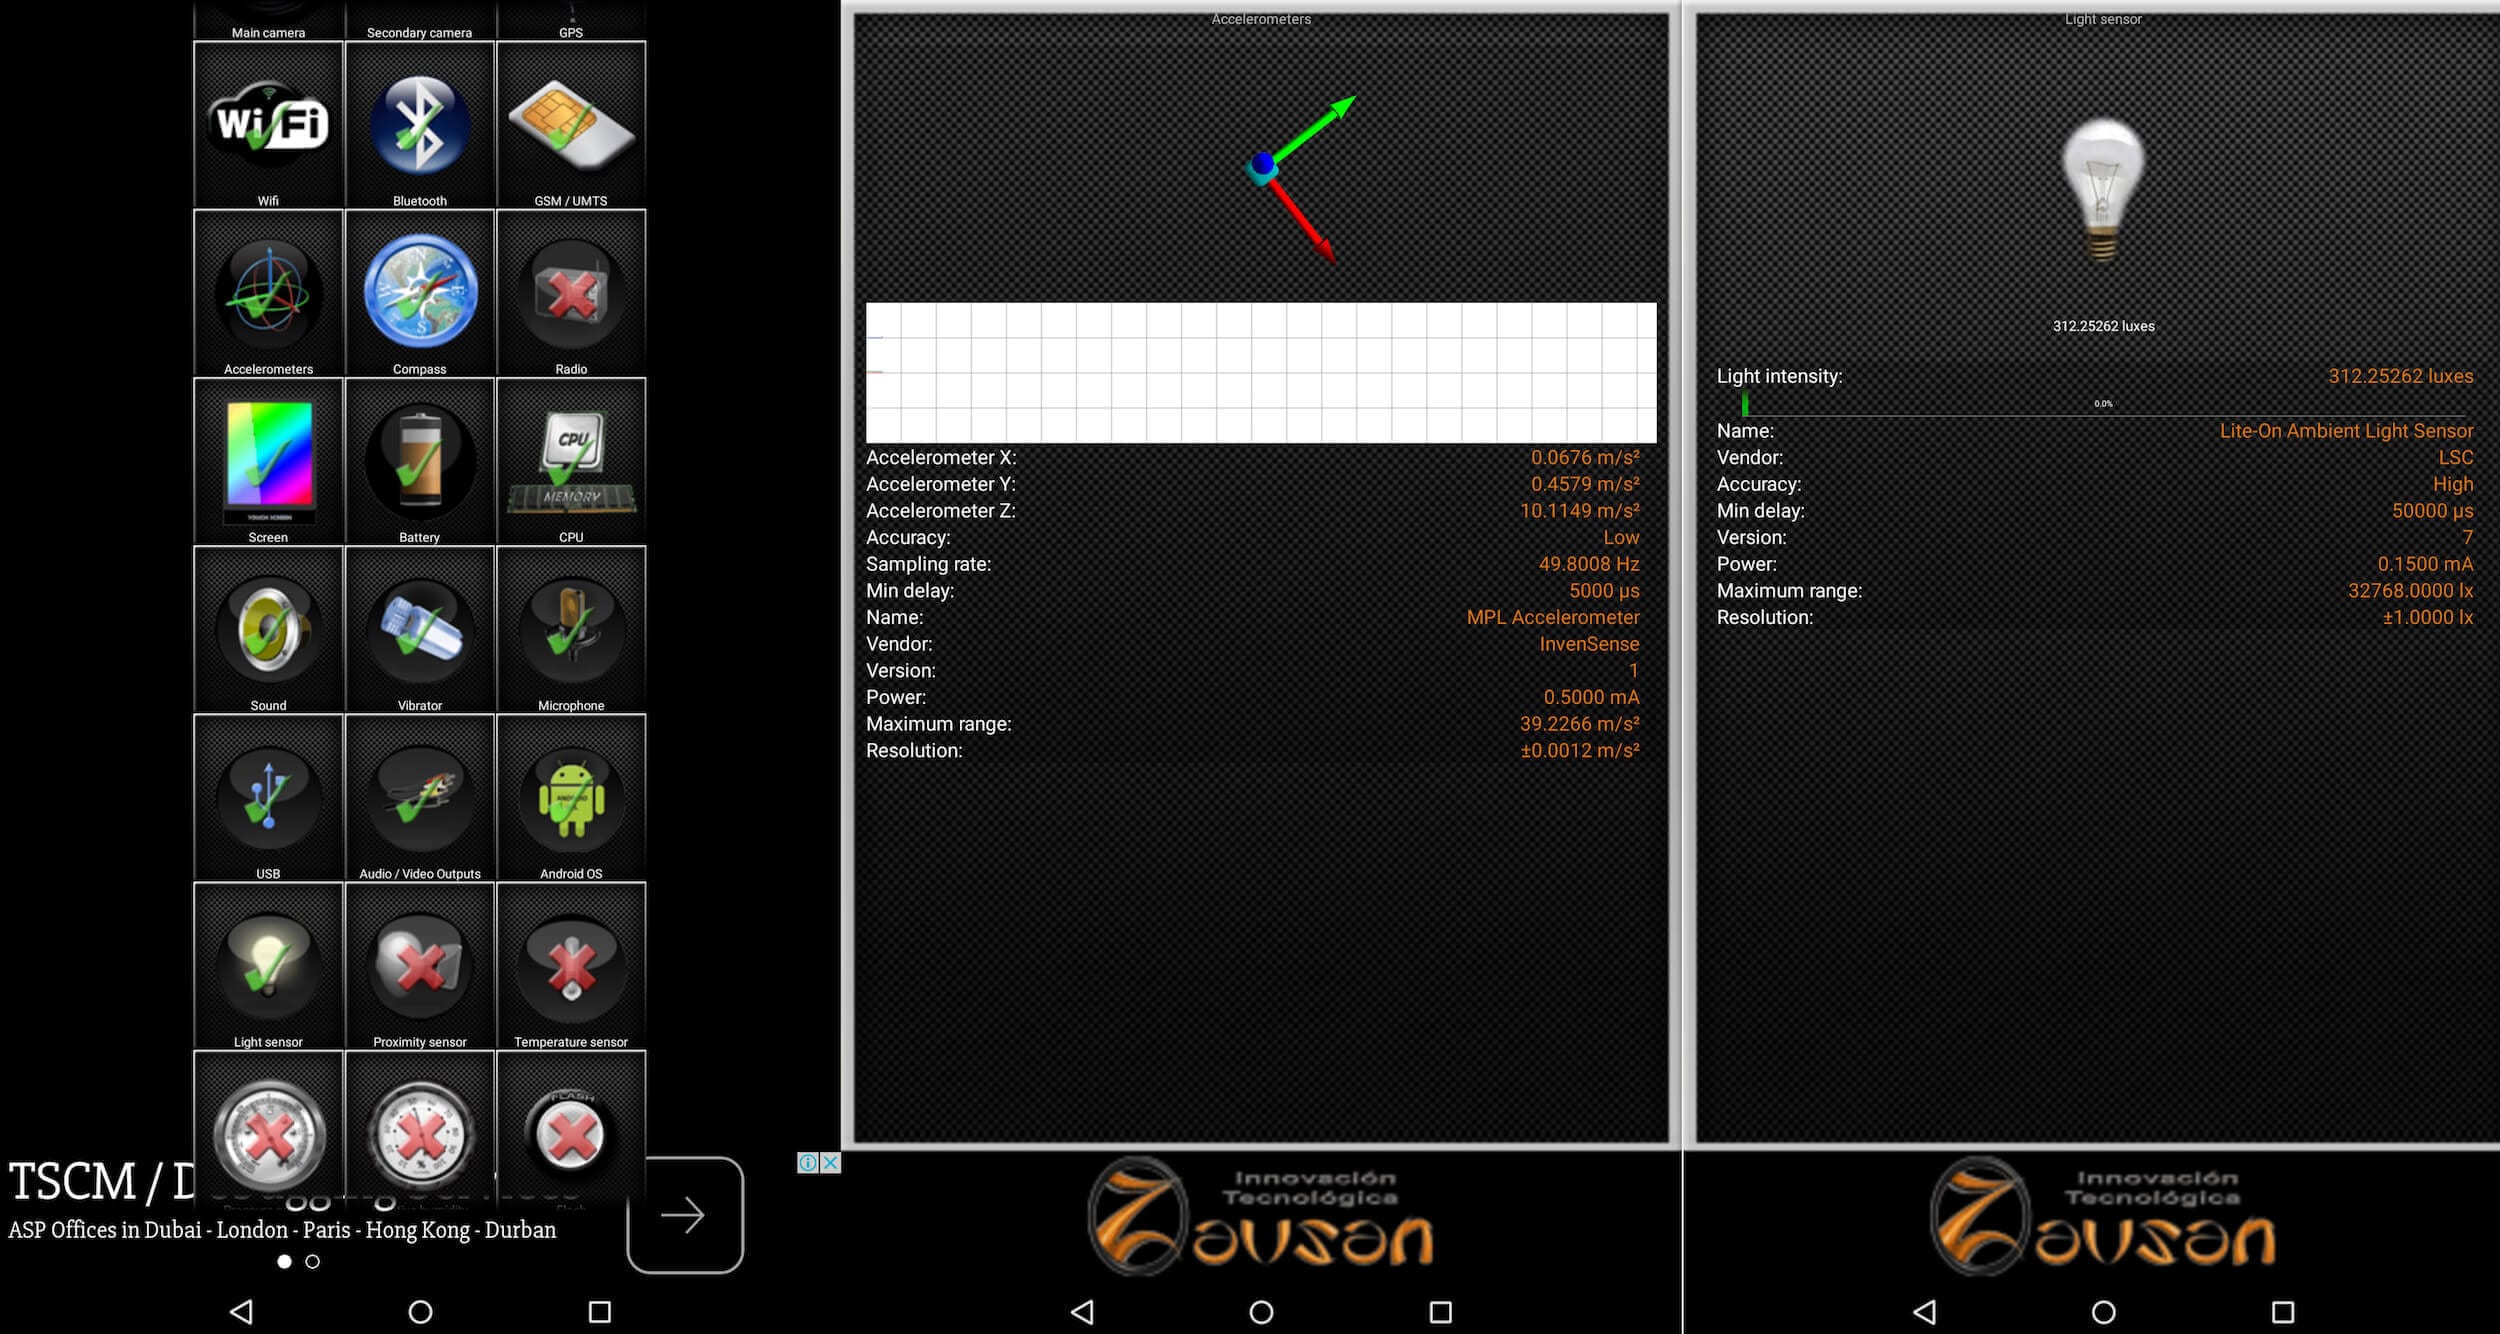
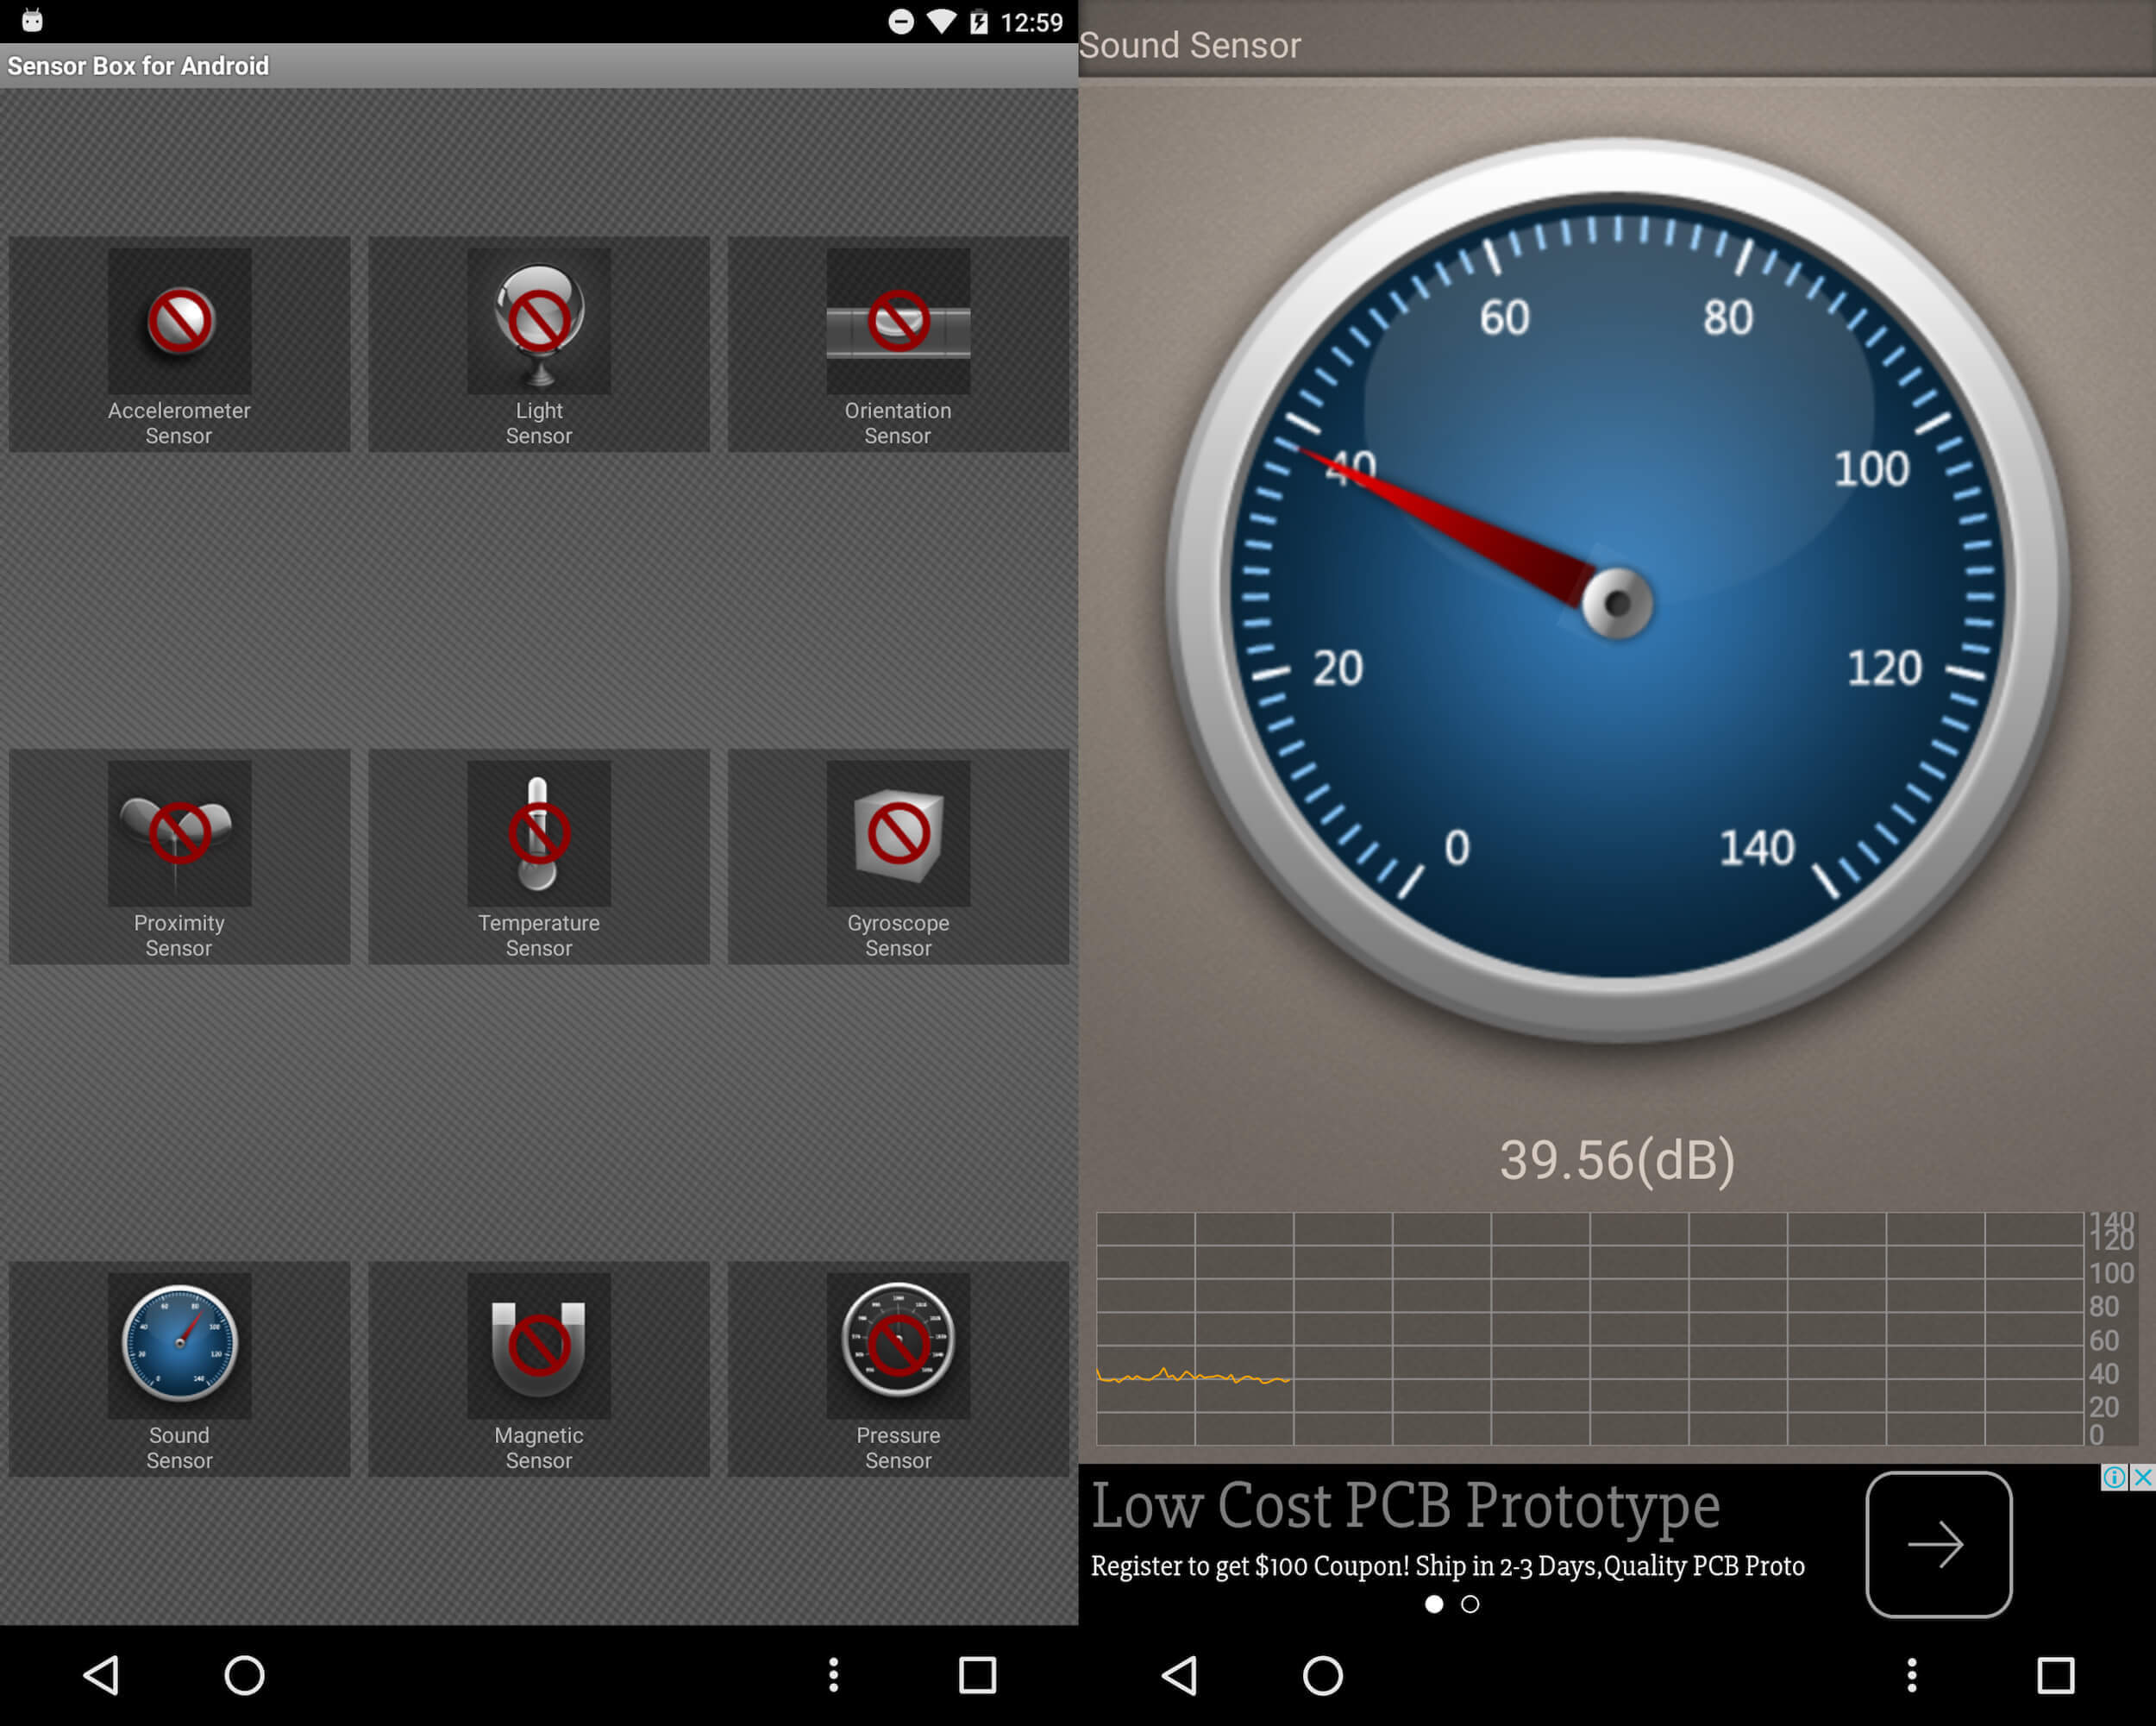
This app is made by IMOBLIFE INC and essentially performs the same functions as the previous two, but it has richer graphics. Every device sensor has a specific 3D illustration of its work (e.g. ball on a table for gyro sensor, or flower which grows if light sensor works), so it very clearly demonstrates the working principle of each sensor. This is a cool tool if you need to show your users or clients how beautifully your new ROM works.
Sensors included:
- Gyroscope
- Light
- Orientation
- Proximity
- Temperature
- Accelerometer
- Sound
- Magnetic Field
- Pressure
The app will show you all available sensors immediately after launch. If you assume there are going to be some hardware issues during development or alpha testing and want to have an easy way to check, this app will help you.
As you can see from the screenshot, we have some unavailable sensors and the app detected them immediately.
One more important thing to consider is performance and battery life. All manufacturers have to figure out a way to balance great performance with long battery life. This challenge will affect you as well and you need to be ready to test it.
Geekbench 3
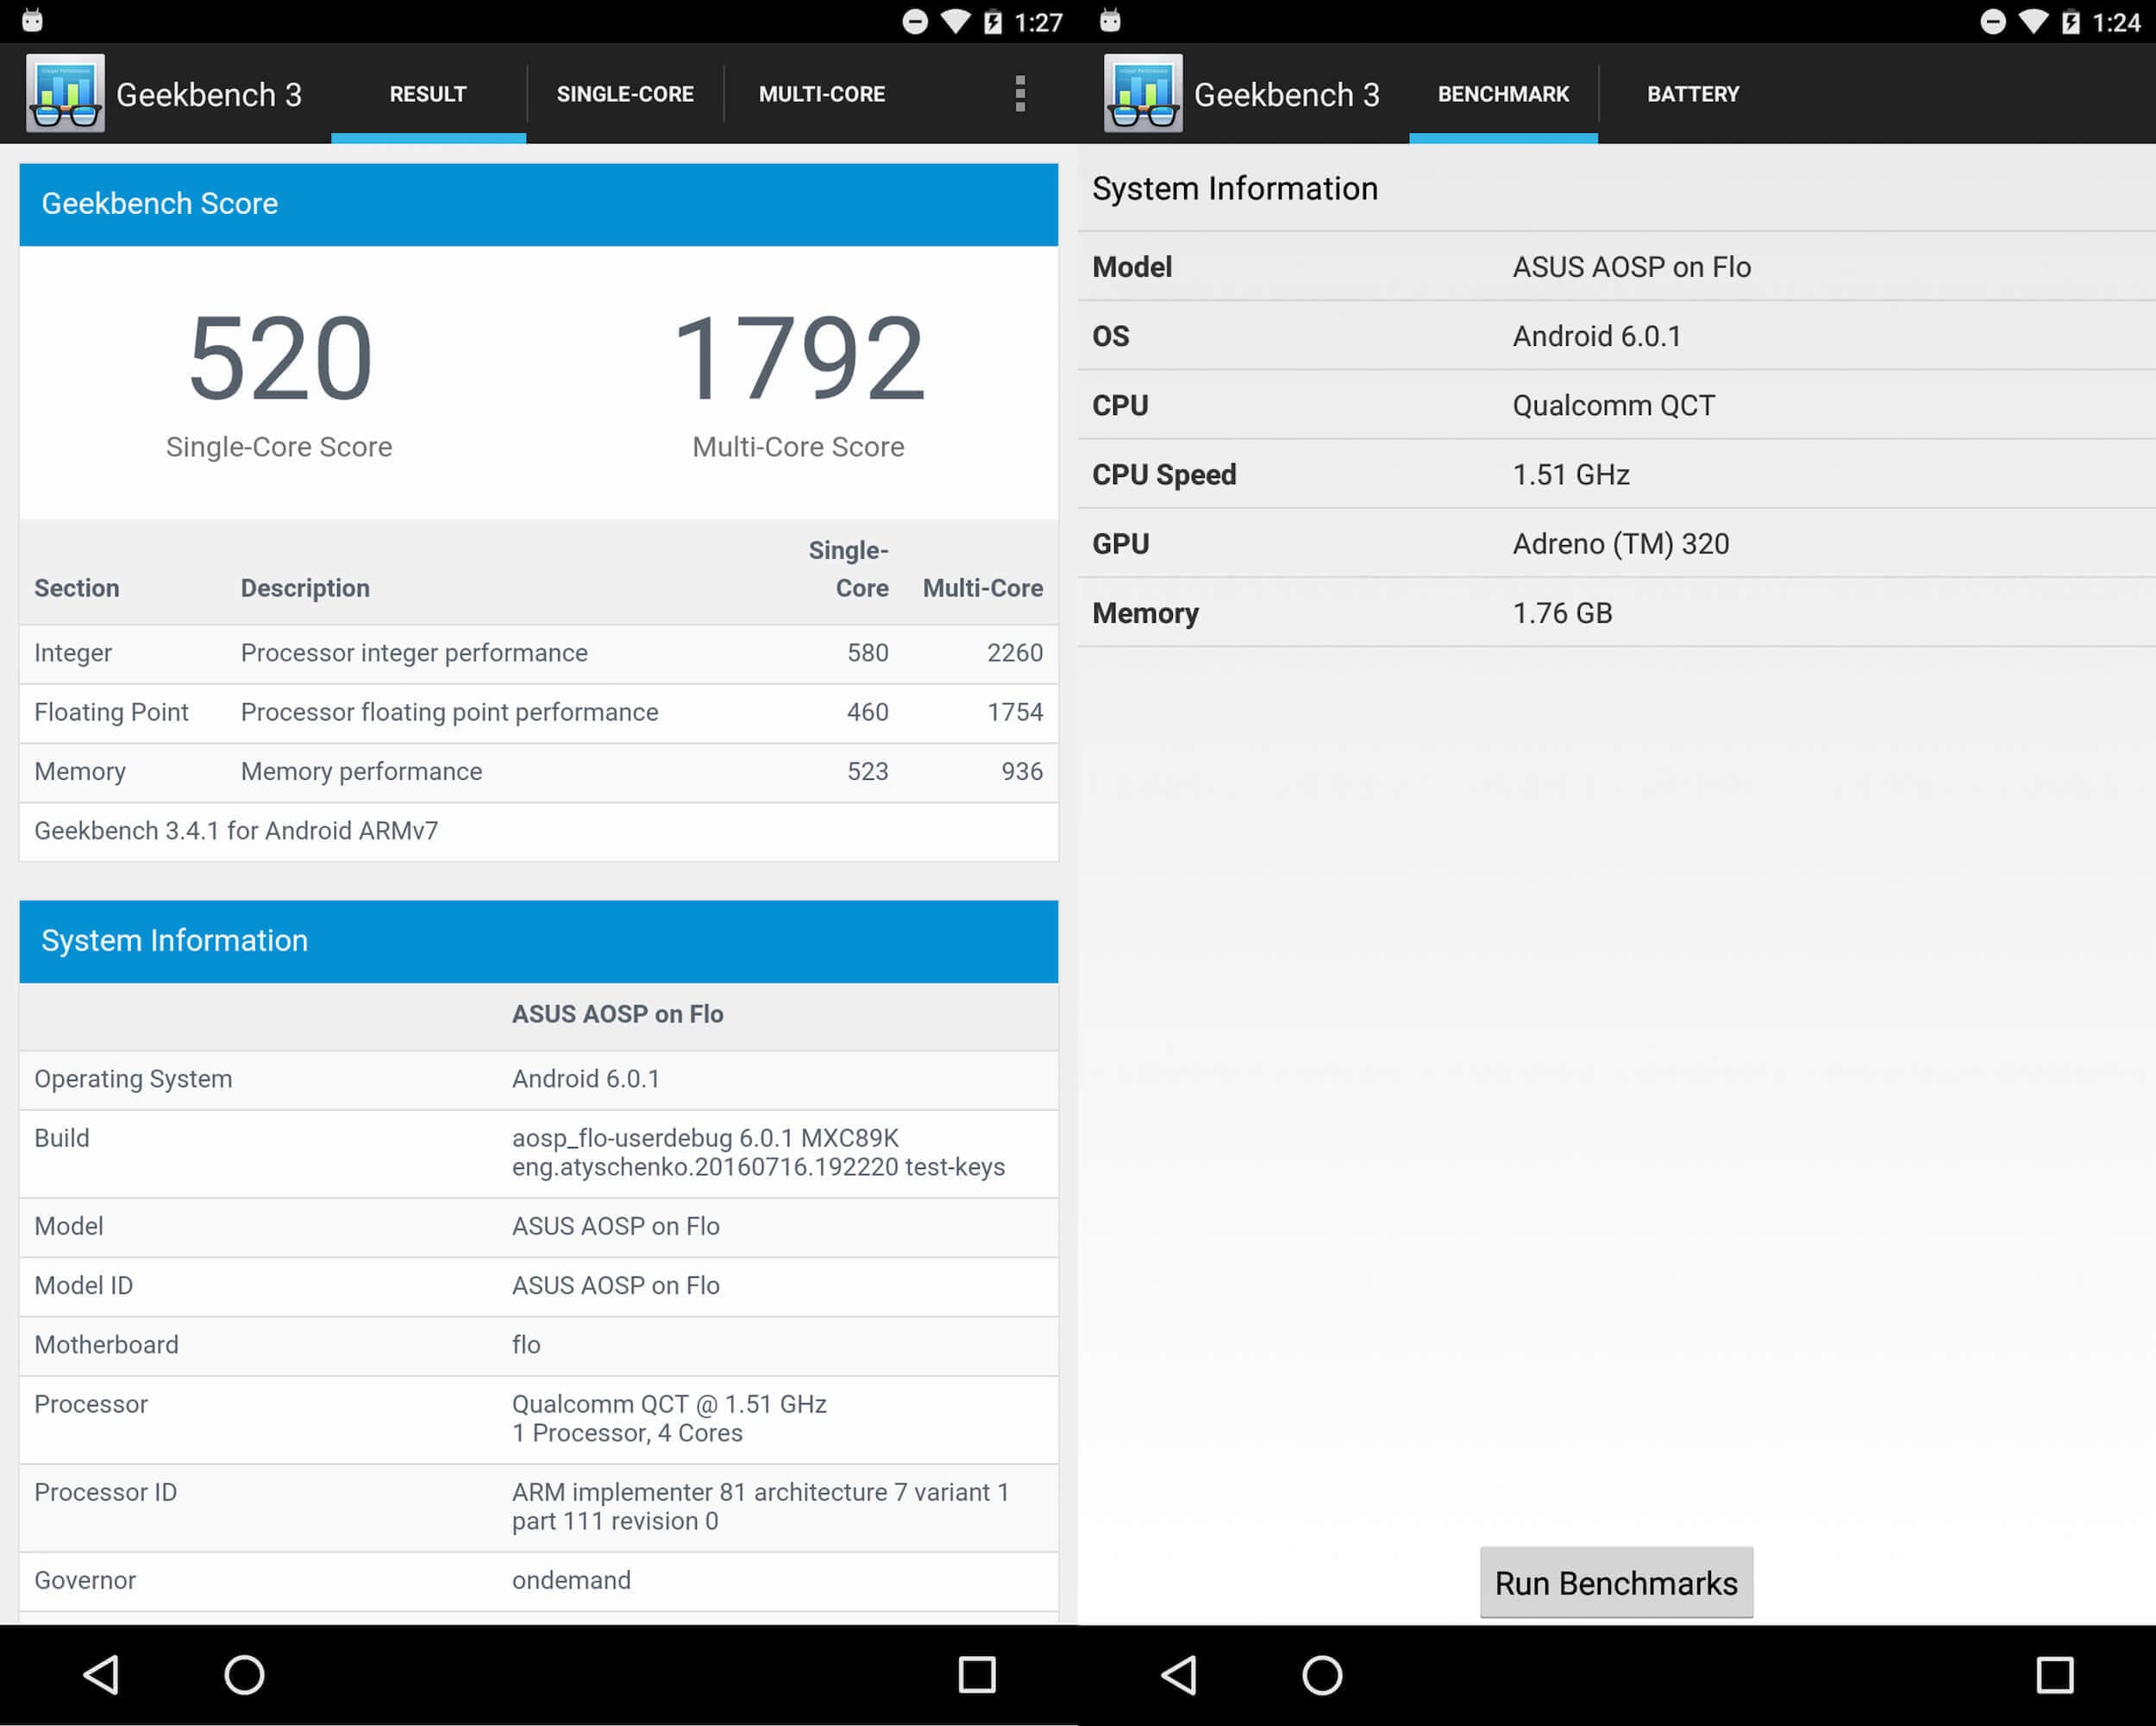
This is a well known cross-platform benchmark. Basically, the app displays a score based on CPU/GPU performance. It might be useful to check this score with the native ROM and with your custom ROM and compare results. It could help you to find out whether your ROM has suffered a loss of performance. The app also allows you to store benchmark results online and compare them with the same devices across the world.
Geekbench 3 simulates real-world scenarios and quickly and accurately measures mobile processor performance.
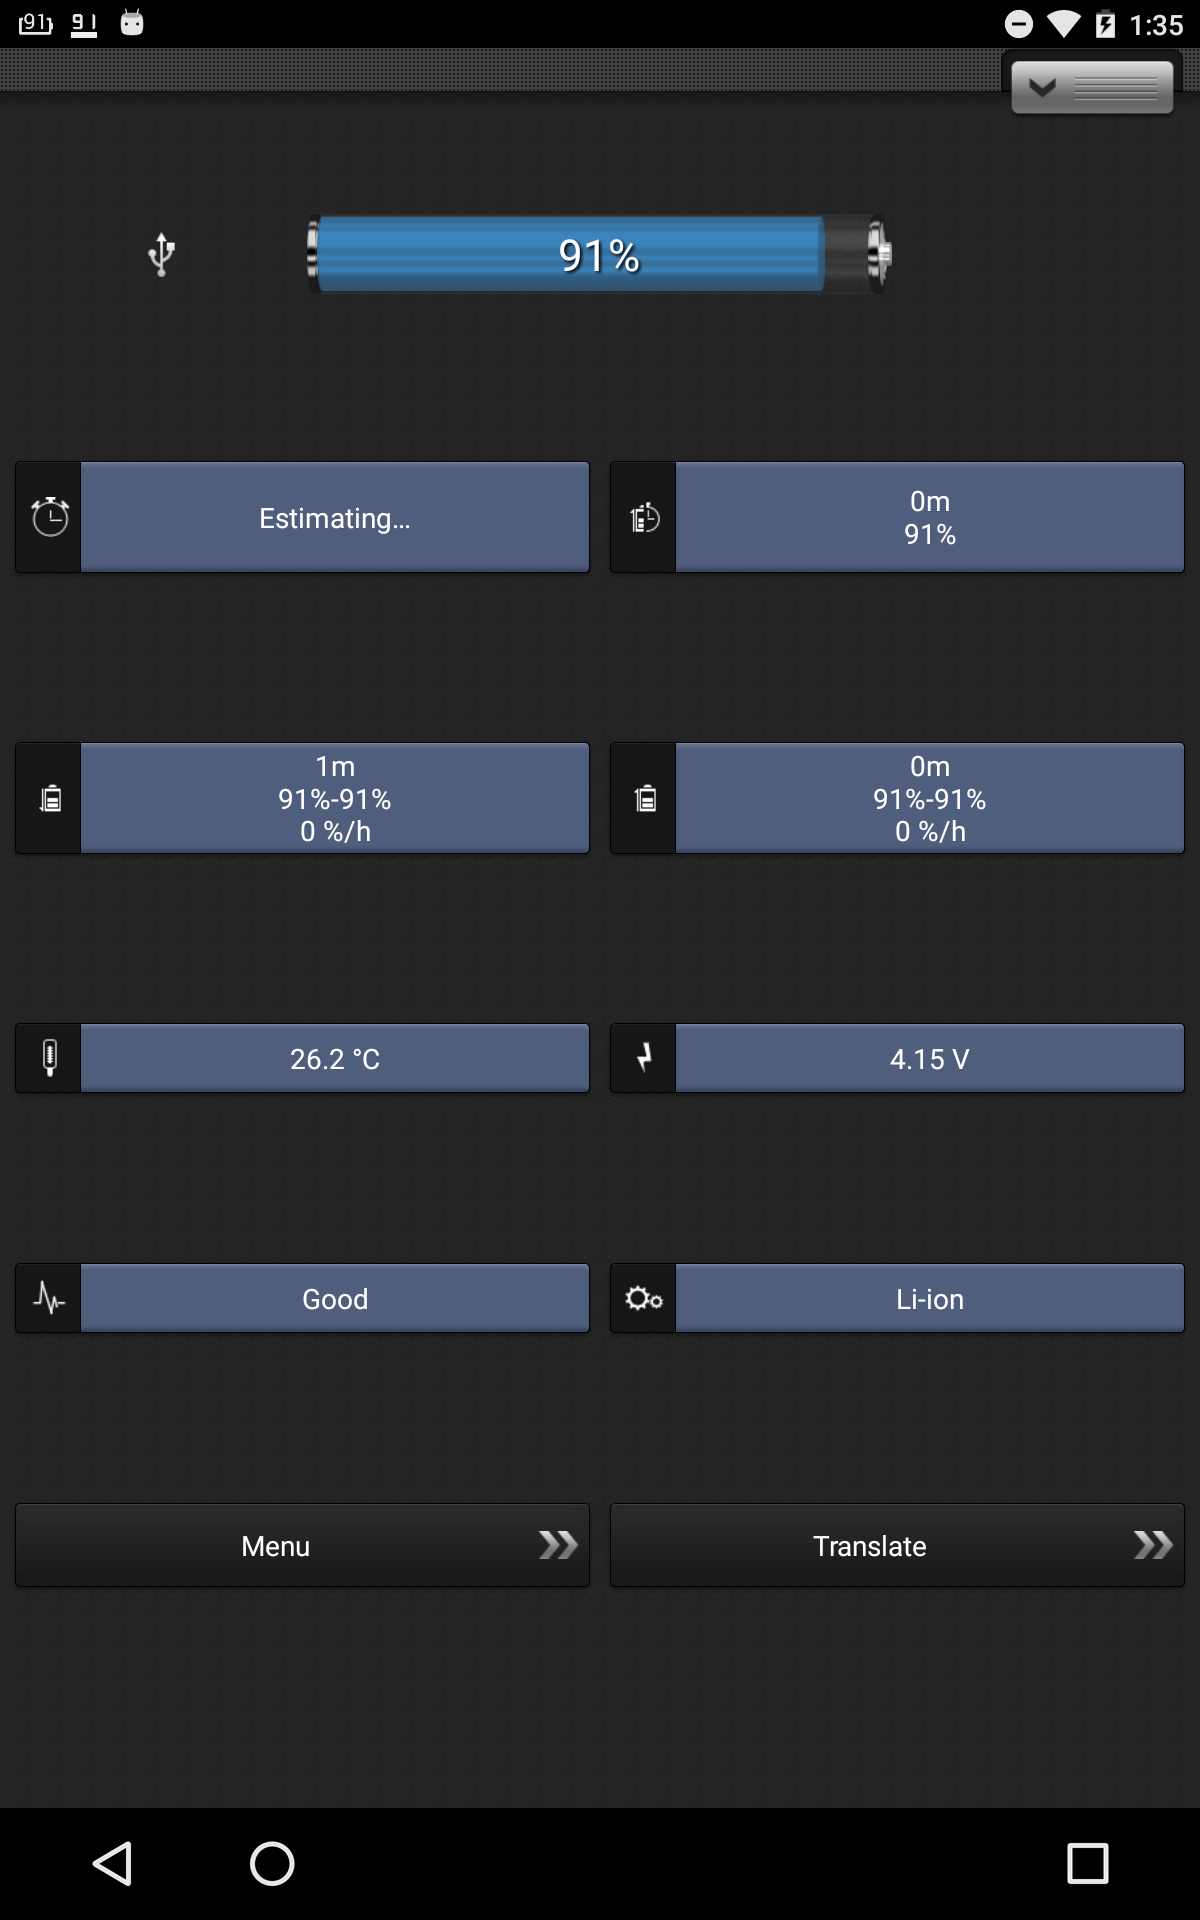
Battery Indicator
This one is a tool to monitor battery drain. The app displays:
- Estimated time left to discharge.
- Temperature.
- Voltage.
- Charging or discharging velocity in percent per hour.
- System’s information about what drains your battery.
It allows you to monitor how your new ROM works with the battery and fix some leaks at the very beginning of development.
Google Compatibility Tests
Google Compatibility Tests (CTS) is an official tool recommended by google, so you can be sure your Android will work as expected and it will also help you to receive google certification and eligibility for GMS. This is a cool tool for automations, which you can also use during manual testing.
You can run CTS from Terminal in scope of manual suite and then check result manually, as it provides results that can be read by humans. This is a JAVA based tool, so you need to make sure JAVA 6 is installed. Also, you need to download CTS for a specific platform version. Here is an example of how to run it from Terminal:
$ path/to/android-cts/tools/cts-tradefed

$ run cts --plan PlanName
You’ll see results in Terminal after a couple minutes. It’s maybe not that convenient to have to read all logs manually, but the information might sometimes be useful.
There is no major difference between all these apps in Play Market and any of them could check your device, but you need a strong Test Plan to follow. You can’t avoid mistakes altogether when performing manual tests, but your challenge is to reduce them as much as possible.
Summary
As result of our testing, we will know the general condition of a new ROM and have the confidence that our shipped product is stable, matches our acceptance criteria and is ready to be used by end users. Don’t try to bite off more than you can chew. Just play around with tools, methods, some best practices and compose your test suite for your own needs. It’s not possible to test everything, but you always need to keep in mind the things we have just discussed, such as:
- Hardware.
- Software.
- Compatibility.
- Test plan.
Focus on having a straightforward process that defines the workflow of development and which has been covered as much as possible with tests. The main aim is to end up with a happy customer and users who like your product.
